Search This Blog

White Chicken Lasagna

>> Monday, September 12, 2011

So, I'm not sure if I've ever had chicken lasagna before, but when I found this recipe on Pinterest.com, I knew I wanted to try it.  It was fairly easy and definitely worth the wait!

\

Recipe:  White Chicken Lasagna


lasagna noodles (I used 9, but you could use 12 )
1/2 c. butter
1 onion, minced
2 cloves garlic, minced
1/2 c. flour
1/2 tsp. salt
ground black pepper, to taste

2 c. chicken broth

2 c. nonfat milk

4 c. mozzarella cheese, divided

1 c. shredded or grated Parmesan cheese, divided

1 tsp. basil

1 tsp. oregano

1 c. part-skim ricotta cheese or Cottage Cheese

1 1/2 c. cooked and shredded chicken

1 small box frozen spinach, thawed and drained; liquid squeezed out; or about 2 cups of fresh spinach

1 small box frozen butternut squash puree, thawed; or about 1.5 cups cooked pumpkin, pureed
1 cup thinly sliced mushrooms (optional)


Cook lasagna noodles as directed on package.
Melt butter in a large saucepot.  Add onions and garlic and cook over medium heat until translucent.  Add flour, salt, and pepper.  Cook flour mixture 1-2 minutes.  Add chicken broth and milk.  Bring to a boil; cook and stir 1 minute.  Turn off heat and add 2 cups mozzarella cheese and 1/4 c. Parmesan cheese.  Stir in dried spices.
Lightly spray a 9×13″ baking dish with nonstick cooking spray.  Ladle some cheese sauce onto the bottom to thinly cover.  Add a layer of lasagna noodles.  Layer with more cheese sauce, the chicken, and the ricotta/cottage cheese.  Add another layer of pasta.  Top with cheese sauce.  Using a spoon, spread the butternut squash puree on top of the. Add spinach and mushrooms (optional).  Add final layer of lasagna.  Top with remaining cheese sauce and sprinkle with Parmesan cheese.
Cover with foil and bake at 350 degrees for 40 minutes.  Remove foil and continue to cook until bubbly, about 15 minutes.  If cheese doesn’t brown on top, turn on the broiler for the last couple minutes.  Allow lasagna to sit about 15 minutes before serving for easier slicing.


Read more...

We will never forget.

>> Sunday, September 11, 2011


"The attacks of September 11th were intended to break our spirit. Instead we have emerged stronger and more unified. We feel renewed devotion to the principles of political, economic, and religious freedom, the rule of law and respect for human life. We are more determined than ever to live our lives in freedom." 
-Rudolph Giuliani, former mayor of New York City

Read more...

Texas Sheet Cake

>> Saturday, September 10, 2011

If you've never had Texas Sheet Cake, you are missing out on one of life's best desserts.  If you've never made Texas Sheet Cake, you're missing out on one of the easiest desserts to make!  No mixer required.  No bringing butter or eggs to room temperature.  No weird ingredients.  But SO yummy!

I grew up on Texas Chocolate Sheet Cake and recently found a version for White Texas Sheet Cake.  Let's just say that I'm only kinda glad I found the white version.  Because I will make it way too often.  And I'm trying to lose some baby weight!  But for now, I'm nursing baby Molly and need extra calories, right?!  


TEXAS CHOCOLATE SHEET CAKE
Recipe from an old PTA cookbook that my mom has
2 C Flour
2 C Sugar
2 sticks butter (1 cup)
4 T cocoa
1 C water
1/2 C Buttermilk (or 1/2 T vinegar + milk to make 1/2 Cup)
2 beaten eggs
1/2 t cinnamon
1 t baking soda
1 t vanilla

FROSTING
4 T cocoa
1 stick butter (1/2 cup)
5 T milk
1 lb. Powdered Sugar
1 t vanilla
1 cup nuts (optional)

DIRECTIONS:  Mix flour and sugar in a large bowl. Combine the butter, coca, and water in a small saucepan and bring to a rapid boil.  Watch carefully because it boils over quickly! After it comes to a rapid boil, pour into the bowl over the flour and sugar mixture. Add remaining ingredients and mix well.  Pour into a greased 15-in. x 10-in. x 1-in. baking sheet. Bake at 350 for 30 minutes.

FOR FROSTING:  Combine cocoa, butter and milk in a medium saucepan and bring to a boil.  Take off heat and add powdered sugar. Add vanilla.  Beat well and spread on warm cake.  Sprinkle nuts on top while icing is still warm if desired.     


http://www.life-as-a-lofthouse.blogspot.com/2011/06/white-texas-sheet-cake.html
WHITE TEXAS SHEET CAKE
Recipe from: All Recipes.com
1 cup Butter
1 cup Water
2 cups All-Purpose Flour
2 cups Sugar (white granulated)
2 Eggs, beaten
1/2 cup Sour Cream
1 tsp Almond Extract
1 tsp Baking Soda
1 tsp Salt

FROSTING:
1/2 cup Butter
1/4 cup Milk
4 1/2 cups Confectioners' Sugar
1/2 tsp Almond Extract

DIRECTIONS:  In a medium saucepan bring butter and water to a boil. Meanwhile, in a large bowl add flour and sugar. Mix. Then add in eggs, sour cream, extract, baking soda and salt. Slowly pour in the boiling butter/water mixture. Stir with a spatula until well combined and smooth.  (No need to use an electric mixer!)  Pour into a greased 15-in. x 10-in. x 1-in. baking sheet. Bake at 375 for 20-22 minutes or until golden brown. Cool for about 20 minutes.

FOR FROSTING:  In a large saucepan, combine butter and milk. Bring to a boil. Remove from the heat, and then stir in sugar and extract. Stir until smooth and all combined. Spread over warm cake. Decorate cake with sprinkles, if desired.


Read more...

Slow Cooker Lasagna

>> Friday, September 9, 2011


We're all looking for hearty meals that aren't too hard to put together, especially with school and sports activities.  In general, I am not a huge fan of my slow cooker.  There are some dishes I like in it, but some I feel end up tasting the same.  I thought I'd give this recipe I try, but I was skeptical.  It turned out really, really well.  Everyone really liked it. 

The recipe comes from the Kraft website.
1 lb. lean ground beef or turkey
1 jar  (24 oz.) spaghetti sauce
1 cup water
1 container  (15 oz.) Ricotta Cheese
1 pkg. (7 oz.) 2% Milk Shredded Mozzarella Cheese, divided
1/4 cup  Grated Parmesan Cheese, divided
1 egg
2 Tbsp.  chopped fresh parsley
6 lasagna noodles, uncooked

BROWN meat in large skillet; drain. Stir in spaghetti sauce and water. Mix ricotta, 1-1/2 cups mozzarella, 2 Tbsp. Parmesan, egg and parsley.
SPOON 1 cup meat sauce into slow cooker; top with layers of half each of the noodles, broken to fit; and cheese mixture. Cover with 2 cups meat sauce. Top with remaining noodles, broken to fit; cheese mixture and meat sauce. Cover with lid.
COOK on LOW 4 to 6 hours or until liquid is absorbed. Sprinkle with remaining cheeses; let stand, covered, 10 min. or until melted
My slow cooker takes 3-4 hours, so watch this the first time you make it.
To go with my lasagna, I made Hamburger Bun Toasts and a salad.

Hamburger Bun Toasts (adapted from Paula Deen)
4 tablespoons melted butter
1 teaspoon prepared mustard
1 teaspoon worchestershire sauce
1 1/2 teaspoons garlic salt
4 hamburger buns, split
1 1/2 cups shredded Swiss cheese (you could use whatever cheese you have but Swiss is best)
In a bowl, combine melted butter, mustard, worchestershire sauce, and garlic salt until well blended. Allow to cool and solidify a little.  Spread over the cut side of buns and place on a baking sheet.  Top with cheese.  Broil on the middle rack until the cheese is melted and the buns are lightly toasted, maybe 5-7 minutes.  Watch closely!!

The salad:
mixed greens, mandarin oranges, carrot, cranberries, and candied walnuts with balsamic dressing.

To make the candied walnuts (SO GOOD):  put 1/2 cup sugar in a heavy bottomed saucepan and heat until it becomes a liquid (stir the whole time).  After it becomes a light amber color, mix in 1 1/2 cup walnuts and stir to coat.  Spread onto a parchment paper lined baking sheet and separate the walnuts with forks.  Sprinkle with a pinch of salt.  Let cool completely.  Store leftovers in a ziploc bag.

Read more...

Fall is here!

>> Thursday, September 8, 2011

So, Saturday was 99 degrees out and so humid, but ever since Labor Day we have barely hit 70 degrees!  Needless to say, the change in weather was much less subtle than normal!  I welcomed the cool weather this year...I love jeans and t-shirt weather :)  Fall is quickly becoming my favorite time of year.  Probably because I've been pregnant the last 3 out of 5 summers (2007, 2009 and 2011)!

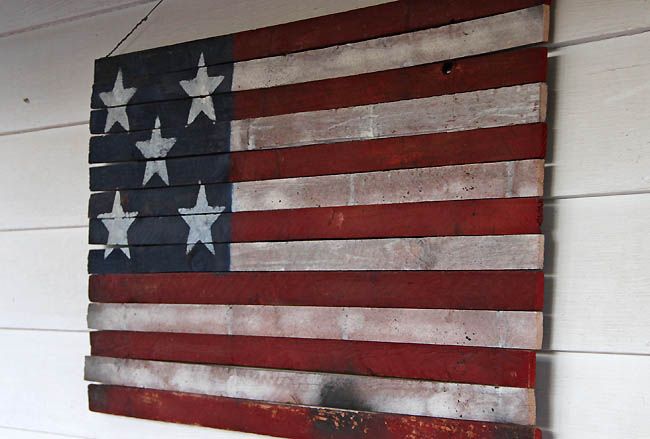
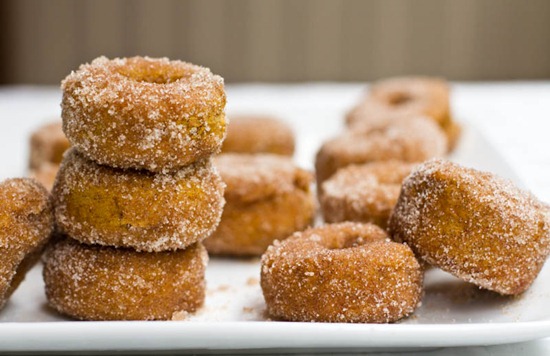
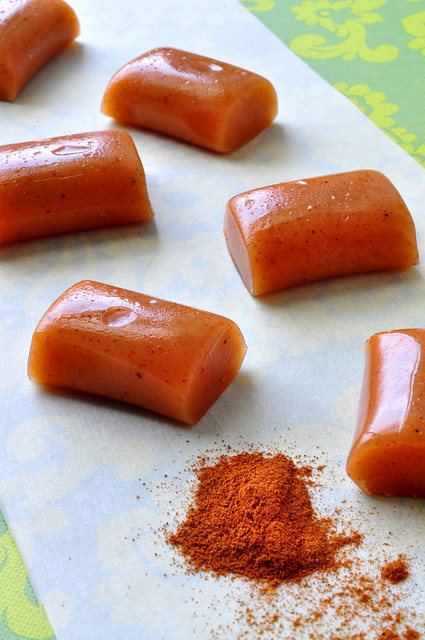
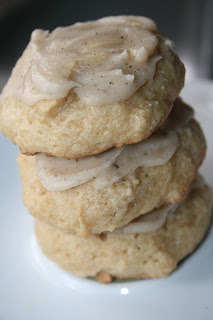
Here are some things I found browsing Pinterest.com and thought I would share.  These things get me into the fall spirit!

http://ohsheglows.com/2011/08/16/mini-cinnamon-sugar-pumpkin-spiced-doughnuts-rosemary-olive-oil-chips/

http://www.thehighheeledhostess.com/2011/09/festive-fall-porch-ideas.html

http://www.craftinessisnotoptional.com/2010/10/paper-pumpkin-tutorial.html

http://familyofcrums.blogspot.com/2010/09/artsy-fartsy.html

http://abeautifulmess.typepad.com/my_weblog/2011/09/fall-leaves-garland-diy-project-.html

This is a cool photo idea...carve your chidren(s) ages into the pumpkin and have them hold it in their lap.
http://mymontessorimoments.com/2010/10/30/my-pumpkins/

Read more...

Yearly Photo

>> Wednesday, September 7, 2011


I saw this idea on Flickr a few months ago (I made this in March), but recently I've seen several different variations floating around Pinterest.

For a yearly photo that records a little more information than a picture alone, you want a photo of your child against a solid colored background.  This is a blue door in downtown Lebanon.  Position your child so that you have a good bit of blank space in the photo.  In this one, my negative space is to his side, but you could also position your child sitting and then leave blank space above them.  They could even be holding some balloons to the side.  Or if they are really into a certain object/activity you could include that in the photo.  For example, my son could have been sitting with a toy tractor.  But overall, I think it is best to keep the photo pretty simple to focus on the words. 

Here's my original photo, so obviously I did some enhancements in photoshop. I think the only critical thing would have been to remove the door knob and crop out the door frame on the side.  You could do that in most of the free photo editing programs, or if not you just want to make sure you position your child against a space without anything like that which would have to be removed.
For the final step, I just used a few different fonts and typed over the photo.  I am really unfamiliar with anything but Photoshop, but I would think this is possible in the other photo editing programs?  If not, Photoshop Elements is not that expensive and well worth the money!!! I made my travel cards with it (posted last week), I use it for digital scrapbooking, and of course I edit all my photos with it (and sometimes I use Lightroom too).  You can download a free 30 day trial from the Adobe website if you're interested in trying it. Here is a link:  Adobe Photoshop Downloads

For the past 5 years, I've done a yearly family scrapbook and then 2 years ago started doing a book for each child on a yearly basis.  I will share those soon (when I get caught up!), but they are alot more work than this photo.  As moms, we always intend to record more memories than we are able to end up actually doing.  This is a great quick way to make sure you get some of the things about each child recorded yearly.


Read more...

What I'm Listening to Now

>> Monday, September 5, 2011


I bought this album recently and it is amazing!!  Her voice is spectacular.  Follow the link and listen to the previews on amazon. 

Read more...