Search This Blog

Showing posts with label healthy. Show all posts

A Food Journey

>> Thursday, March 7, 2013

So, Lesley has encouraged me to chime in to her "Spring Break Shape-Up" series. My eating plan looks a little different than Lesley's eating plan, but there is one huge commonality...NO PROCESSED FOODS! Ok, I'll revise that and say minimal processed foods.  Because I don't think it's realistic for me to say that I won't ever eat anything processed.  I do agree with Lesley that eating and nutrition is a huge part of losing weight and that your focus should be on what you put into your body vs. how many calories you can burn at the gym. If you are feeding your body junk and working out a lot at the gym, I really don't think you are a healthy person.  I have tried focusing on training in the past and didn't really pay attention to what I was eating and I don't think it really had any lasting benefits on my body. So this time around I'm focusing on nutrition, sleep (it's more important than I thought!) and then exercise.

I found this print (you can buy it form the link below) on Pinterest (this will link you to my page!), and I think it really shows the ideal that I am reaching for.


I don't think that there is one diet plan (or healthy eating plan) that is ideal for everyone. You have to know your body and experiment with different foods to see how you feel and if it allows you to reach your ideal body weight.  So, anyway, I've been doing the Paleo diet since January 2. My first step into going Paleo was giving up Gluten (wheat, barley, rye) just after Thanksgiving. I gave myself a month to adjust to a gluten-free lifestyle and then went full Paleo. I really like Whole 9's description of Paleo:


"We eat real food – meat, fish, eggs, vegetables, fruit, healthy oils, nuts and seeds. We choose foods that were raised, fed and grown naturally, and foods that are nutrient-dense, with lots of naturally occurring vitamins and minerals.
This is not a “diet” – we eat as much as we need to maintain strength, energy, activity levels and a healthy body weight. We aim for well-balanced nutrition, so we eat animals and a significant amount of plants.
Eating like this has helped us to look, feel, live and perform our best, and reduces our risk for a variety of lifestyle-related diseases and conditions."

So, there's a lot to it, but basically as a healthy way of eating (and long-term sustainability), I eat meat, seafood, LOTS of vegetables, a little fruit and some healthy oils (coconut oil, EVOO, avocado).  I will be honest and say that I have cheated. More than once. But I still feel better than I did before going Paleo.

So what does a day of food look like for me? Well, I typically have 3 meals and try not to snack in between. I don't have any grains, so breakfast looks a little different for me than a typical breakfast (no cereals, oatmeal, pastries, etc). For lunch I usually have leftovers from the previous evening and I typically either make something in the crock pot for dinner or bake something in the oven.  I will admit that my kids are still eating gluten (although much more limited than previously) but they are also eating a lot more vegetables than they used to. They still won't touch a salad, but they tried roasted red beets and radishes last night for the first time...progress!

*Disclaimer - all of these photos were taken with my tablet and are not great quality, but you get the idea.

Breakfast:

Breakfast typically consists of eggs with some meat. I typically like to scramble up a dozen eggs and then refrigerate them to eat the next few mornings. This morning I had eggs with onions and green peppers and bacon :)


Lunch:

Lunch is usually leftovers or a salad. This salad is mixed greens, baby spinach, some micro greens (found at a local farmers market!), cilantro, 1/2 avocado, leftover pork chop, blueberries, balsamic vinegar and olive oil. Yummy and filling!


This recipe is a Tuscan Chicken Soup I found on Pinterest. It was really good...I didn't have any baby radishes, so I subbed some parsnips and daikon (in the radish family) for it and it turned out good (though I think it would be good with the radishes as well!).


Dinner:

Dinner is the one meal I usually make every day...unless our fridge is full and we need a leftover night for dinner (which I really don't mind!!).  Here is a meal where I made some french onion soup and bacon-wrapped chicken with vegetables.  I don't have a recipe for the onion soup...I basically sauteed a couple onions in a skillet and then added some beef broth until it looked good and let it simmer for about 20 minutes :)  The chicken dish was based on this pinterest pin except I wrapped the chicken breasts in bacon and then omitted the Italian dressing packet and butter and just sprinkled some salt, pepper and Trader Joe's "21 Seasoning Salute" (basically just mixed herbs). I used broccoli, cauliflower and green beans for the veggies. Yum!


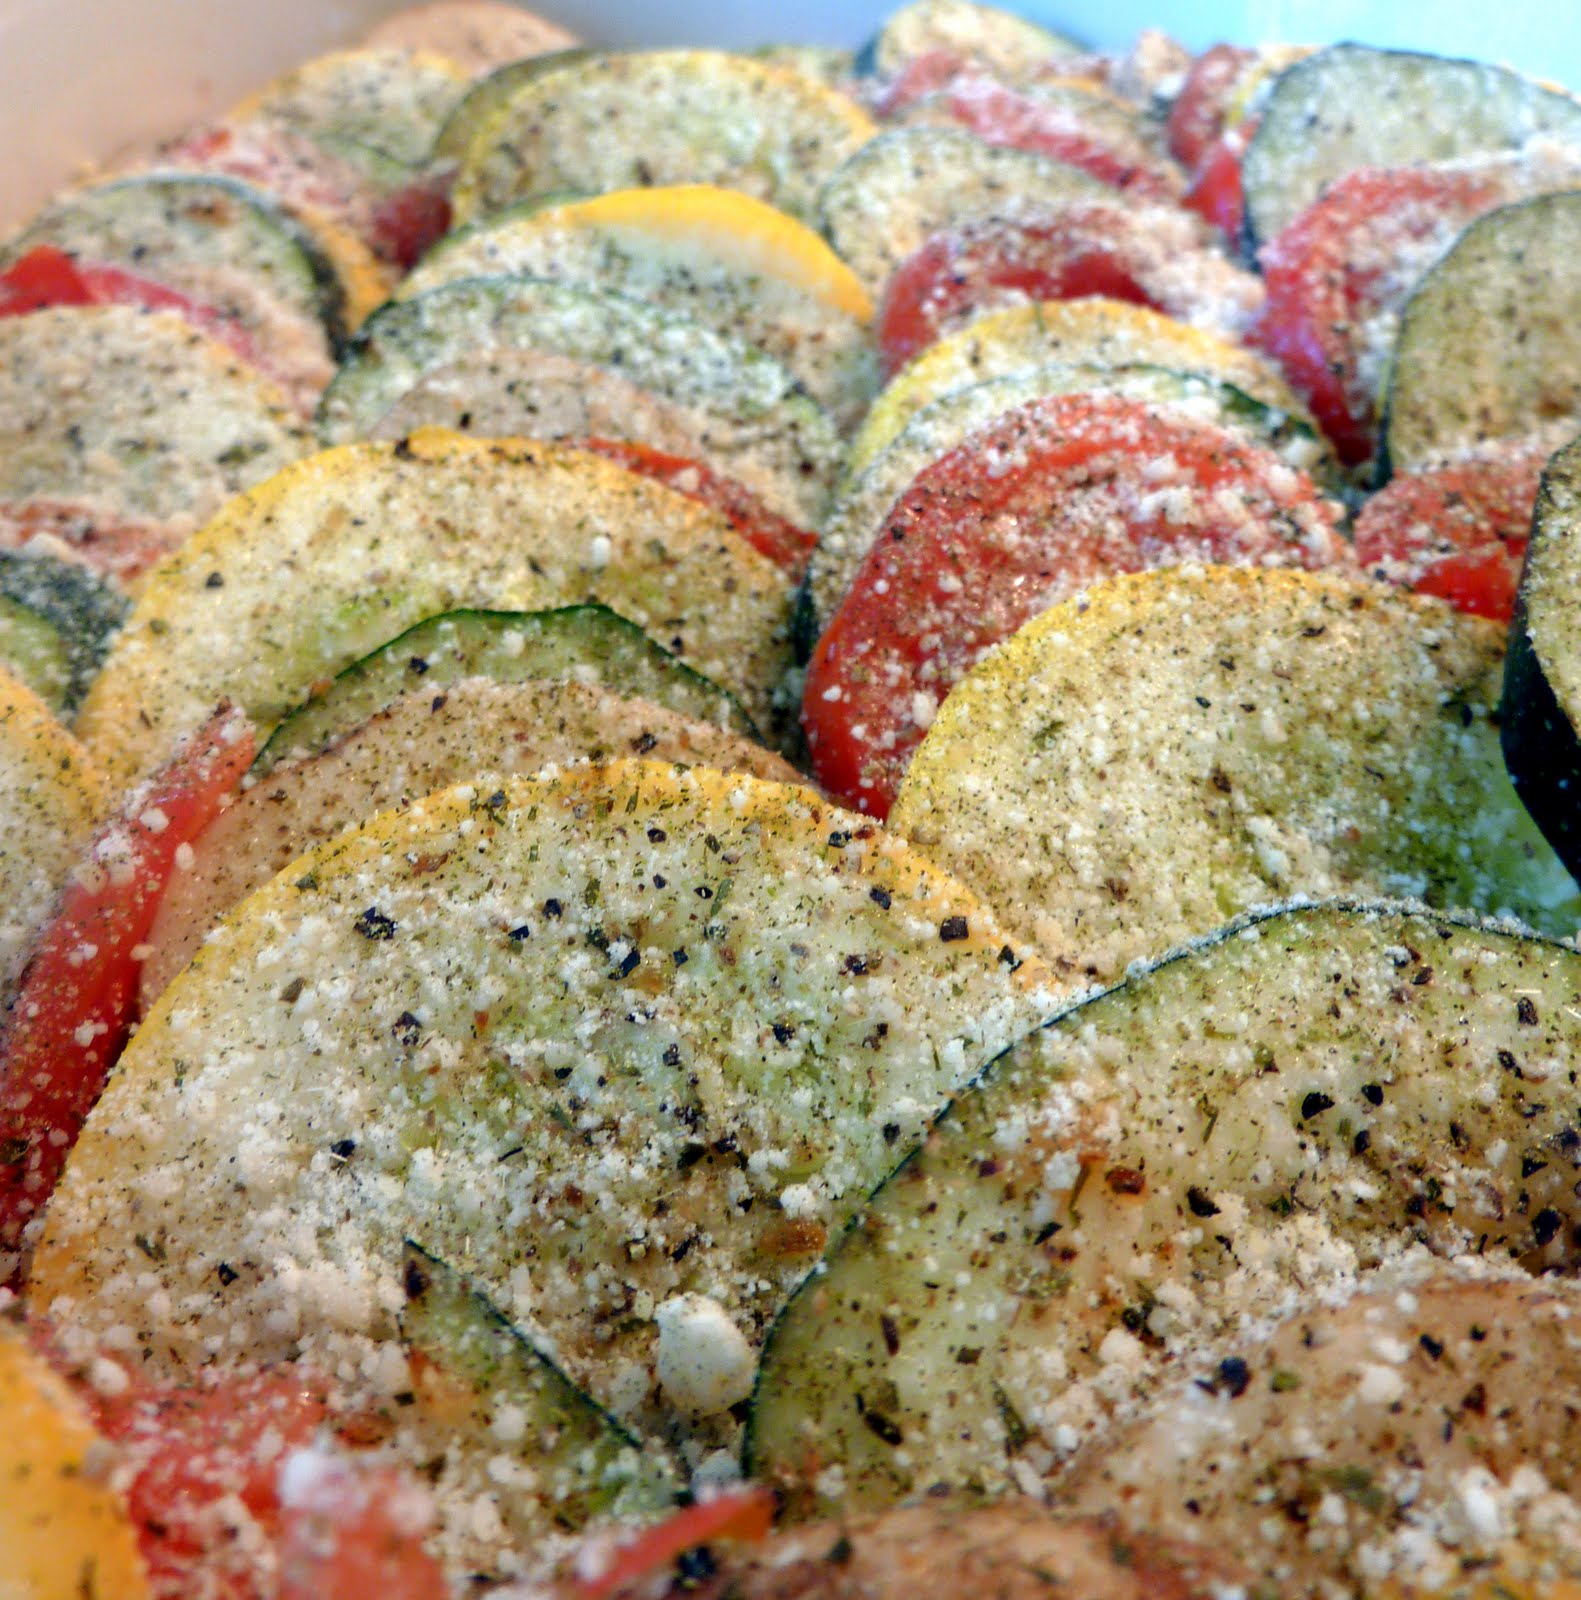
So, for nights when I don't have time to bake for a long time or have forgotten to put something in the crock-pot, I tent to use sausage and roast some veggies. This is an easy dinner to pull together and is what we ate for dinner last night. It's a Chicken Apple Sausage (it's technically not paleo because it has a little brown sugar, but it didn't have any "scary" ingredients and didn't have any added nitrates...basically the shorter the ingredient list, the better and avoid things you can't pronounce or don't know what they are) which was sauteed in a skillet with onions and mushrooms, and then I roasted some baby yellow carrots (organic, from Kroger) red beets and radishes. I also steamed some broccoli, orange carrots and radishes on the stove to compare and see which we liked better (Steve liked the steamed radishes better but I liked the roasted).  This meal was easy because I had my fridge stocked with veggies!


Snack:

We do typically have a before-bedtime snack with the kids. I've been trying to make it healthy and give them some grapes, strawberries or kiwi (or whatever fruit we have on hand).  I also like to pop some popcorn (not Paleo, but I do buy organic popcorn which should be GMO free) in some organic coconut oil and add some Himalayan pink salt (I found a big grinder at Costco, but have also purchased it at Trader Joe's).  Another snack/dessert that the kids enjoy is "Banana Swirl". They saw it on PBS one afternoon and begged me to make it.  Basically you just freeze a banana (either whole with the skin on or you can peel it and chop it up into bite-sized pieces) and put it in a blender or food processor (our food processor works better than the blender) with a little bit of almond milk.  Blend to soft-serve ice cream consistency and serve immediately. You can also do add-ins for a flavor variety: cinnamon, vanilla, chocolate chips, almond butter, strawberries, etc. So good! This is what I gave the kids for snack last night :)


I also love chocolate, so I keep some Paleo chocolate in my fridge for when I get a chocolate craving. I don't have a recipe for this either, but I just melt some dark chocolate (look for chocolate that is soy-lecithin free like the brand Enjoy Life) and some unsweetened baking bars in a double boiler on the stove. Once melted, I add in unsweetened coconut and other add-ins depending on what I have around...dried fruit and nuts are usually what I grab. Then I take an ice cream scoop that is about 1T in size and scoop the chocolate mixture out onto parchment paper sitting on a cookie tray and refrigerate until set. They resemble a traditional "No-Bake" cookie, but don't have any refined sugar or oats.  They are dark, so they aren't super-sweet, but they are sweet enough to give me the chocolate fix when I need it. I keep them in the fridge and then take one out and let it sit at room temperature for 10-15 minutes to let it soften a bit.  This helps with portion control as well :)


So, that's what I eat in a typical day. I'll write future blogs about where I find my recipes (great Paleo sources are EVERYWHERE!), things I'm discovering, books I'm reading, some resources I've found helpful, and if my changed eating habits are having any real affects on my health.  I took some before photos on January 1, and while I'm not comfortable sharing them here, I might share them in a few months with some after photos.

Read more...

Unjunk Your Junk Food...book review

>> Thursday, April 26, 2012

As you know, I've been on a little quest to start eating healthier.  My first step in the process was to start following some blogs and facebook pages to help in figuring out my action plan.  One of those blogs I started following was naturallysavvy.com.  It's a great blog with lots of health related posts with a focus on whole foods  eating and natural health.  So, when I saw that they were coming out with a new book and were looking for bloggers to review it, I signed up!  And guess what?  I got picked!  Yay!


The book is called, "Unjunk Your Junk Food".  What a great title.  Because honestly, no matter how healthy you are, you still have snack foods or quick foods that you grab when you are in a hurry or just want a snack.  But at the same time, you don't want to sabotage your healthy, clean eating by grabbing the wrong things.

The book starts out by going over some definitions.  It was helpful to me because I'm just starting out on this journey.  It listed some good ingredients with funky names...like ascorbic acid...did you know that it's Vitamin C?  And it lists bad ingredients, like Potassium Sorbate...did you know that it's a preservative that has been "linked to asthma, skin rashes, diarrhea, and hyperactivity in some people" (page 23)?  But, I would have thought that ascorbic acid would be bad for you (acid, hello?) but something with potassium would be ok.  Obviously I have a lot to learn!

The book also has a list of 7 worst ingredients in food...check out the article on their website that goes into a little detail.  But those ingredients aren't always clearly identified on the label, so how do you know for sure?  That's why it's awesome that this book also includes a "Worst Ingredients" chart on page 25.  It's actually a tear-out page to keep in your purse so you can check the labels before you put something into your cart.  The front side of the sheet are the worst ingredients and the back contains ones you should have caution in consuming. For me, this alone was the best part of the book....it's definitely something I will be carrying with me when I'm doing my shopping.  You can also download the list if you register on their site!

So, the rest of the book is practical applications of what you just learned.  It goes through different categories of snack foods and gives you an example of a bad choice with the following page showing you a much better choice.  The snack food categories it covers are: 1) Chips, Dips and Party foods, 2) Ice Cream and Frozen Treats, 3) Cookies, 4) Chocolate, 5) Cakes and other desserts (Yay!), 6) Granola Bars and on-the-go snacks, 7) Candy, 8) Soda and other drinks.


Here's an example of one of the pages...my favorite, Cookie Dough Ice Cream!  So, on the left it shows the bad option including the ingredient list with the worst ingredients printed in red and the ones to beware of in orange.  And there are like 170 pages just like these!  The thing I find most helpful is that I'm able to look at the highlighted ingredients in the bad ice cream, so I know what to look for when I go out and buy some for us.  Obviously all the ingredients are listed on the master list, but I found it extremely helpful to have an idea of what to look for in each of the snack categories.

So, after reading the book, I went through our snack cabinet to see what was in there.  It needed organizing desperately anyway, so it was great timing!  Here's a "before" photo...


And here it is all organized out on the counter.  Now the fun begins of looking at the ingredient lists!


I have a mix of "healthy" options and "not at all healthy".  I'm currently in the phase of buying better food for our family, but I hate to waste things so I haven't made a purge and thrown any of the bad things away.  First up are some Special K cracker chips that I bought last week.  They taste good, but they do contain TBHQ in the ingredients.  TBHQ is on the worst ingredients chart (red) because it is a petroleum-based  food additive to increase shelf life.  According to the book, "it has been associated with nausea, vomiting, tinnitus, and prolonged exposure has been linked with cancer"(page 24). Bummer...looks like these go on the "do not buy again list."


 Next up is my beloved girl scout cookies.  I love the shortbread ones, and the ingredient list actually looks ok until you get down to the very bottom and see "artificial flavoring".  According to the book, "artificial flavoring is a blanket term that could include on or hundreds of unnatural additives.  For example, a typical artificial strawberry flavor contains forty-nine chemical ingredients!" (page 23).  Unfortunately, this was also the case for my favorite brownie mix, Ghirardelli Dark Chocolate.


The worst offender I found in the snack cupboard were Cheese Curls.  My boys love them and while I didn't think they were the best choice (obviously), they were much worse than I thought and I won't be buying them any more.  They contained MSG, artificial colors, artificial flavors (all on the worst foods list), and Disodium inosinate and disodium guanylate (2 flavor enhancers on the "beware" list).


Fortunately, the book had Cheese puffs (p40 & 41) and compared the Cheetos (bad choice) to Barbara's Cheez Puff Bakes, Original Cheddar.  I haven't purchased these before, but will definitely be looking for them as a replacement.


So, after organizing the snack cupboard, I had to check the freezer for my coveted Ben & Jerry's ForoYo Half baked ice cream.  And I'm so excited that it doesn't have any of the worst ingredients or the caution ingredients!  Yay!


So, what are the results from this snack cupboard clean-out?  First, I definitely need to start reading the ingredients list before putting things into my cart.  I will be carrying the list of the ingredients to avoid and beware in my purse to reference if I have questions while I'm shopping!  I have a lot to learn, but this is a great resource for beginners.  If you are interested in buying the book, you can find it on Amazon. You can also follow Naturally Savvy on Facebook, Twitter, and Pinterest.


* I received a free book in exchange for my review.  The opinions expressed are my own and I did not receive any monetary compensation for my review.

Read more...

Grocery Trip

>> Tuesday, April 3, 2012

So, the focus of our blog isn't to share coupons, grocery ads for the week, or anything along those lines. When Lesley and I met together to talk about our blog, we both agreed that there are plenty of other blogs out there that already do those things.  Our goal was to share real experiences from our lives, recipes that we've enjoyed and ways we have made our houses a "home".

As such, I have never shared about my grocery trips or how I use coupons (or not).  But this post is different.  I wanted to share a photo from a recent trip I made to the store.  I just went to pick up a couple things I needed for a cake and also wanted to check and see what they had as far as organic items.


So, I bought some Kale and grapes...neither of them are organic or new purchase for me, but I knew we would eat them.  The new stuff for us...Organic Whole Milk, Keifer fruit smoothie (not organic, but I've heard good things about Keifer), Sunflower oil and Organic coconut oil.  I was excited to find the coconut oil but it was really expensive!  I also bought some organic butter and I just realized i forgot to include it in the photo :(

The problem is that I'm new to buying organic items, so I really don't have a price reference on them.  I have no idea if $3.58 for a 1/2 gallon of organic milk is a good price, average price or on the higher end!  So, my next project is to create a spreadsheet that I can use to compare the non-sale prices on the new items I'm planning on purchasing.  That is what I did when I quit my day-job to stay home with my babies and it gave me a good reference to start learning what was a good deal on items that I was purchasing all the time.

And for breakfast, I had some Kashi cereal with Organic Soy milk.  Tyler wanted some as well and he thought it was yummy :)


Read more...

Eating healthy

>> Monday, April 2, 2012

So, lately I've been trying to eat healthier.  Partly because my body still isn't back to normal since having baby #3.  And by normal, I don't mean back to pre-pregnancy weight or pre-pregnancy sized clothes, but I mean health wise.  My last A1C (the average blood glucose level for about 90 days) was over 8.  To give perspective, the goal is less than 7 and a normal person without diabetes usually is between 4-6.  An A1C of 8 or higher means your average glucose levels were around 205...yikes!  The problem with this is that the longer your body stays at the higher level is the higher risk you have of developing complications.

Another medical condition that I've had since I was diagnosed as Type 1 diabetic in 2004 is high cholesterol.  I tried changing my diet (although my diet has never really been that high in cholesterol to begin with), but that had no effect on my cholesterol levels and I was put on Lipitor.  I didn't have any adverse reactions to the drug (that I know of), but was taken off of it when we started trying to have a family (it causes birth defects so you can't be on it if you are pregnant).  My doctor mentioned to me at my last checkup about going back on it since we are finished having kids.  However, I'm still nursing so I can't be put back on it until Molly is weaned.  Anyway, my bad cholesterol is 132.  Which isn't super-high, but again with being diabetic, they want it less than 80.

Anyway, all that to say, I've been trying to change my diet and adding some supplements to 1) get my blood sugar back into a normal range, 2) hopefully get my cholesterol under 100, with a goal of not ever going on Lipitor again, and 3) become more healthy to lose a little weight and maintain a healthy weight for the rest of my life.

So, this is what I had for breakfast:


And it was good!  This was my first time buying soy milk and I must say that I tried to drink a glass of it and it was disgusting.  But, when I put it on the cereal, it was really good.  I also put it in some organic Annie's mac-n-cheese for the boys the other day and they didn't even notice.  In fact, they had thirds.  We haven't made all the changes to eating as healthy as I would like, but we are making progress!


Read more...

Peanut Butter Banana Chocolate Chunk Cookies

>> Sunday, March 25, 2012

I've been trying to catch up on pinterest the last couple days because I've been so busy that I haven't been on there much.  There are a couple spring/summer projects that I want to do, so I was searching for some inspiration and instructions on how to do these projects.  First, I want to buy, re-build or build a new swingset from scratch.  Not sure which way I'm going on this project yet, but I was able to find some ideas on what I want with a limited budget, limited space and limited time.  Another project that i want to do is to replace our door to the basement with a sliding barn door.  You know, like a pocket door, but on the outside of the wall.  When our door is open now, it swings out into the hallway and is just in the way.

Anyway, whenever I'm on pinterest, I tend to find a lot of YUMMY looking recipes.  I also found this quote...which is totally true for me!  


I'm Type 1 diabetic, but I love my sweets and baked goods.  That's probably the reason I started my at-home bakery. :) And also the reason why I love my insulin pump so much!

Anyway, back to the whole purpose for this post...to share a "healthy" cookie recipe I found on there.  it's Vegan Peanut Butter Banana Chocolate Chunk Cookies.  These were good!  They don't have any refined sugar in them and they also don't have any flour.  It's still a "dessert" so you have to eat them in moderation (I've only eaten 4 today, haha!), but it's much healthier than eating one of those frosted cookies that are so yummy but so fattening!

cookie dough
baked!
Here's the recipe.  I need to note that I used green coconut.  Not because it's any better or anything, but I made some cupcakes and dyed coconut for those.  I way over-estimated and had a lot leftover, so I bagged it up and put it in the freezer to keep.  Since I was just making the cookies for us to eat at home, I figured it couldn't hurt!  The interesting thing was that just the coconut stayed green...it didn't make the whole cookie green like I thought it would.  Also, my cookies weren't vegan because I used regular chocolate chips (but I did use bittersweet ones).  I think if I make it again I will use less coconut and more oats...just because I don't really care so much for coconut.  For better pictures of the cookies (and with regular, un-dyed coconut), click on the recipe link below!

Peanut Butter and Banana Chocolate Chunk Cookies
Recipe adapted from http://fooddoodles.com, originally from Kitchen Karate
Makes about 2 1/2 dozen small cookies
  • 3 large ripe bananas
  • 1/2 C peanut butter
  • 3 tbsp coconut oil(or substitute any flavorless oil like canola)...I used 2 T canola oil plus 1 T applesauce
  • 1 tsp vanilla
  • 1-2 tbsp maple syrup
  • 2 C old fashioned rolled oats
  • 1/3 C shredded coconut
  • 1 tsp baking powder
  • 1/4 tsp cinnamon
  • 1/2 tsp salt
  • 1/2 C chocolate chips
  • up to 1/2 C other add ins(dried fruit, nuts, or more chocolate chips) Optional...I used 1/2 c dried cherries
Preheat your oven to 350 degrees.  Mash the bananas in a large bowl using a fork and combine with peanut butter, oil, maple syrup, and vanilla.  In a separate bowl mix the dry ingredients and then combine with the wet ingredients and mix well.  Add in the chocolate chips and dried fruit and mix just to combine.
Line a baking sheet with parchment paper and drop cookies by spoonfuls 1″ apart.  I used a smaller size ice-cream style scoop and then slightly flattened the tops. The cookies do not spread much and tend to keep their uncooked shape.  Bake for 12-14 minutes just till set.
Make sure they’re completely cool before putting them in an airtight container.  I’d even recommend leaving them on the counter for a couple hours because the bananas in them will make them soft if they’re covered too soon.  But don't leave them out too long, or you'll end up not having any left to put away!  


Read more...

Green Smoothie

>> Thursday, February 2, 2012

I saw that Beth had pinned a recipe for a green smoothie on Pinterest recently, and it reminded me that at one point I had taken a picture of one to share here.  Now I can't find the picture, so here is one I found online. 

IMG_6571-1.jpg

They are also called Green Monster smoothies.  You can find all kinds of recipes online.  It's basically a fruit smoothie with spinach that gives it a green color.  Some people use kale, which I haven't tried yet.  When it is blended, you can't even taste the spinach.  This is my basic recipe, but there are so many variations.  I use about 1/2 a cup of coconut milk, half a frozen banana (I think the banana is key.  The natural sweetness really covers up any spinach that you could taste and freezing it gives the smoothie a great, creamy consistency), a scoop of vanilla protein powder, and a tablespoon of natural peanut butter.  Then I fill the rest of my magic bullet cup up with spinach (maybe a cup or so) and blend.  Add ice cubes and/or more milk as needed to get the right consistency.  You could add in so many other things to increase the nutritional value -- chia seeds, flax seed, etc.  You could also change the fruits and maybe add another veggie that blends well.  But start with one containing banana.  I usually try to keep the caloric content of mine under 300, so that kind of determines what I put in it.  Try it and tell me what you think.  Also share any recipes you come up with here or on the facebook page.

Read more...

Cleaning Your Microwave...the lazy way :)

>> Saturday, October 15, 2011

Ok, so I'm a little embarrassed about this post.  Because this is gross.  And not something I can blame on the kids.  Although, my husband is a big part of this as well, so it's really not just me.  Really.

Here is a picture of our microwave.  Yep, that's splattered food that we didn't clean off right away.  This is how everyone's microwave looks, right?!


Ew.  Anyway, I have found an easier way to clean the microwave.  I've been doing it for years, but just recently learned that not everyone knows this trick, so I thought I would share.  Anyway, the best way to clean your microwave is to clean up the splatter right away so the food doesn't have time to dry out on the sides of your microwave.  Making it impossible to clean and tedious scrubbing.  But that doesn't happen often enough around here since I am usually rushing to get everything on the table at the same time.  So here's my trick....put a glass of water in the dirty microwave like pictured below.


Ok, so it's more work than just putting a glass in the microwave.  Obviously it doesn't clean itself.  But, you put a glass (I always use glass because of the BPA crap in plastics) of water in and turn it on high for a couple minutes.  I always do 2-3 minutes and then let it sit in there for a few more minutes.  Be careful removing the glass because it gets hot and can burn your hands!  The steam from the water you just microwaved will turn the dried out food into "hydrated food" that will just wipe right off.  No scrubbing necessary.  I remove the glass turn table from the bottom and wash that in the sink with soap, but everything else just gets a quick wipe down.  The "after" photo is below.


Like I said, no scrubbing involved.  It's easy peasy.  Now only if I could do it more often so the microwave doesn't get as gross as the first photo!

Read more...

Baked Tomatoes, Squash, and Potatoes

>> Tuesday, August 30, 2011

I get several magazines in the mail.  All of them are free subscriptions that I find online or get for free because of my home-based business.  I actually don't have any that I pay for right now.  One of my favorite magazines (and one I will probably purchase when my free trial runs out) is Whole Living magazine.  It's a Martha Stewart publication, so of course it's good.

Last week I received the September 2011 issue and had a few recipes I wanted to try.  One of these recipes was Baked Tomatoes, Squash and Potatoes recipe found on page 66.  I couldn't find the recipe online yet (they must wait or maybe they don't post them online?), so I'll include the recipe and insert my comments as well...


Baked Tomatoes, Squash, and Potatoes
Serves 8

2 T extra-virgin olive oil, plus more for drizzling
1 onion, thinly sliced
2 tomatoes, sliced 1/4-inch thick
1 medium yellow summer squash, sliced 1/4-inch thick
1 medium Yukon gold potato, sliced 1/4-inch thick
Coarse salt and freshly ground pepper
1 T fresh thyme leaves (I didn't have fresh, so I sprinkled some thyme powder)
2 T freshly grated Parmesean


1. Heat oven to 375. Heat oil over medium and cook onion until tender and lightly golden, 6 to 8 minutes.

2. Arrange the onion on the bottom of a 9x13-inch baking dish. Overlap tomato, squash, and potato on top of the onion. Season with salt and pepper, sprinkle with thyme and Parmesean and drizzle with more oil.

3. Bake covered for 30 minutes. Uncover and bake until golden, 30 minutes more.


I pretty much followed the directions on this recipe except I used 3 potatoes.  The easiest way I found to layer the veggies was to make 4 piles, one of each veggie and then just take one from each pile and put it in the pan.

This recipe was good, but the only problem I found was that since you season the vegetables after you layer them, they were only half-way seasoned.  The part that was under the vegetable on top didn't have anything.  I think next time I make it, I will salt and pepper the veggies before layering them in the pan and then sprinkle the Parmesean over the top of everything.  Either that, or you can put salt and pepper on them after you serve it.

All in all, it's a great use of the seasonal vegetables right now and it's very yummy!  A recipe I will definitely make again!


Read more...

My Favorite Minestrone Soup and Beer Bread

>> Thursday, August 25, 2011

It's that time of year -- the kids are going back to school, football is starting, and fall is right around the corner.  While I love fall, I hate to rush it.  After all, in my opinion it is way too short and winter sets in well before I would like it to.  But mother nature rushes on and while we're enjoying these last days/weeks of summer I am starting to think about fall.

This is a perfect fall dinner.  It's easy, comforting, and filling.  The beer bread recipe is a nod to Tastefully Simple.  If you've ever been to one of their home parties, you've probably tasted it.  I have tried a few recipes to make it and this is the closest I've found.  This bread is super delicious, but it is a heavy bread.  Not your typical light yeast bread.

The soup is a recipe a former co-worker gave me, back in the days that my daily companions were over 4 feet tall!  It was a copy-cat recipe of Maggiano's soup that she found somewhere on the internet.  I wish I knew the source.

Beer Bread
3 cups self-rising flour
1/3 cup sugar
1 teaspoon kosher salt
12 ounces beer {I used Bud Light Lime}
2 tablespoons melted butter
Directions
1. Preheat the oven to 375 degrees F.
2. Butter an 8×4 inch loaf pan and set aside. In a large bowl, combine the flour, sugar, salt and beer; mix well. The mixture will be sticky. Pour into the loaf pan and bake for about 55 minutes.
3. At the last three minutes of baking, remove from oven, brush the top of the loaf with the melted butter and return to oven for the final three minutes of baking.

Minestrone Soup
2 tablespoons butter
1/2 cup diced onion
1 medium carrot, diced
1 stalk celery, diced
1/2 teaspoon dried oregano
1 teaspoon flour
1 clove garlic, peeled and minced
4 cups chicken stock
2 cups Maggiano's Marinara Sauce
1 small baking potato, diced
2 plum tomatoes, diced
1 medium zucchini, diced
1 yellow squash, diced
1/2 cup canned chick-peas, drained
1 teaspoon salt
1/2 teaspoon freshly ground black pepper
2 dark green romaine lettuce leaves, diced
1/4 ounce fresh basil leaves (stems removed), chopped
1/4 cup grated parmesan cheese, plus some for garnish
1/2 cup tubetti or other small pasta
In a large stock pot, melt butter over low heat. Add onion, carrot, celery and oregano. Cook, covered, until vegetables are soft but not browned, about 20 minutes.

Add flour and stir to form a paste. Add garlic, chicken stock, marinara sauce, potato and tomatoes. Raise heat and bring mixture to a boil.

Add zucchini, yellow squash, chick-peas, salt and pepper. Reduce heat to medium-low and simmer, uncovered, for 20 minutes.

Stir in romaine, basil and 1/4 cup Parmesan cheese. Remove from heat and let cool to room temperature. Refrigerate for 12 to 24 hours.

Reheat over medium-low heat. Meanwhile, cook pasta according to package directions.

Divide pasta among individual serving bowls and ladle hot soup over pasta. Serve with Parmesan cheese.

Servings: 8

My Notes:  I don't typically refrigerate for 12-24 hours.  Making the pasta separately keeps the soup from getting too thick.  I used dried basil.  And I use more Parmesan cheese -- this is the key to the flavor in my opinion!

Read more...

Healthy Recipes

>> Tuesday, August 23, 2011

Why do I torture myself by looking at all the amazing, calorie-laden dishes on Pinterest?  There are some healthy ones too, but of course those aren't the ones that attract my attention!  I have recently been making alot of healthy recipes, and have rediscovered a website I used a year or so ago.  It's called Skinny Taste and all the recipes have a nutritional analysis, along with old Weight Watchers points and new Weight Watchers points, in case anyone follows WW.   I have made a couple of things from this site that I didn't like, so if you make something and don't like it, give it one more chance by trying something else.
Here are some of the recipes I've made and loved:
Chicken Parmesan

Crock Pot Santa Fe Chicken:


Click on the recipe titles for the recipes!

Read more...

Southwest Stuffed Peppers

>> Wednesday, August 17, 2011


I found this easy recipe on Pinterest.com several weeks ago and finally had some peppers from my garden to use for it!  I modified the recipe to use some fresh tomatoes from my garden as well.  Here is the original recipe, but below is how I made it.  Easy and simple but yummy!

Southwest Stuffed Peppers Recipe
8 Servings, Prep: 25 min. Bake: 30 min.

Ingredients
·         8 medium green peppers - I just used 4 and baked the remaining rice mixture in a dish without peppers
·         1 pound lean ground beef (90% lean)
·         1/2 can green chilies, undrained
·         2 large fresh tomatoes, chopped
·         1-1/2 cups water
·         1 envelope (5.4 ounces) Mexican-style rice and pasta mix
·         2 cups (8 ounces) shredded Mexican cheese blend


Directions
  • Cut tops off peppers and remove seeds. In a large pot, boil peppers in water for 3-5 minutes. I also boiled the tops and then chopped them up to add to the rice mixture.  Drain and rinse in cold water; set aside.
  • In the same pot, cook beef over medium heat until no longer pink; drain. Add the diced tomatoes, green chilies, water and pasta mix. Also add cooked pepper tops if you would like.  Bring to a boil. Reduce heat; cover and simmer for 6-8 minutes or until liquid is absorbed.  At this point, you might also want to add salt and pepper.  Because you are using fresh tomatoes instead of canned like the original recipe, there is less sodium and you might want to add a little.
  • Fill each pepper about 2/3 full and sprinkle each with 2 tablespoons cheese. Top with remaining rice mixture. Place in a greased 13-in. x 9-in. baking dish. Cover and bake at 375° for 25 minutes. Sprinkle with remaining cheese; bake 5-10 minutes longer or until the cheese is melted and peppers are tender. Yield: 8 servings.


Read more...