Search This Blog

Road Trip Cards

>> Wednesday, August 31, 2011

This weekend is Labor Day Weekend!  I can't believe it is here already, although we've been in school for 2 and a half weeks so it shouldn't be that surprising.  Lots of families (ours included) take trips over the holiday weekend, so I thought I'd share these cards I made for my son's preschool class last year.

There are 4 cards per sheet, since I was doing this for multiple kids.  I printed each page in color on an 8.5x11 sheet of white cardstock since it's thicker than regular printing paper.  Then I cut them into fourths, pasted them back to back (one of each kind and then you'll have 1 by itself if you print all five), laminated them (I have a laminating machine but they also make the laminating pouches that don't require a machine.  If you want to skip this step, you'll just be able to use the sheets once), and punched a hole in the corner.  Then I tied them together through the hole with a little ribbon and added a small dry erase marker that I also tied onto the ribbon.  This makes a cute little car game for the kids.

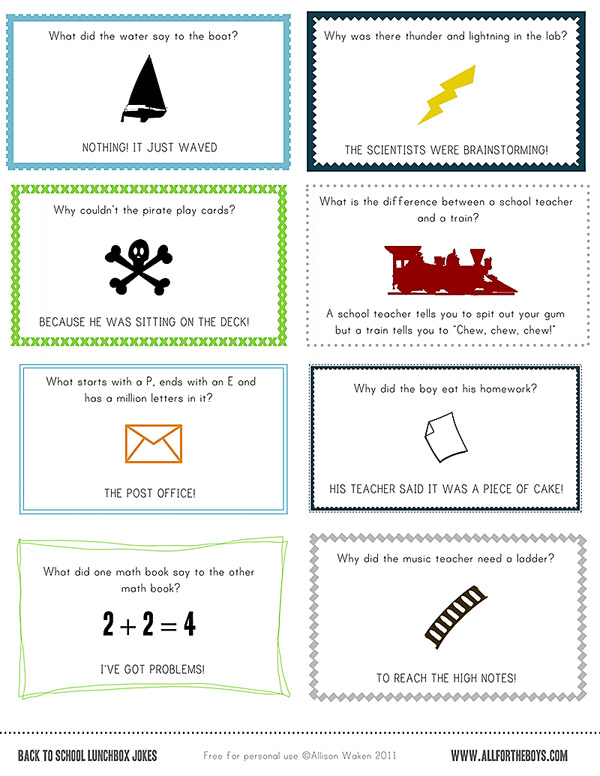
It's by no means professional quality, but  my kids didn't seem to mind.  Please let me know if there are any problems with downloading these.  Below are the pictures to show you what they look like; use the link to google docs below to download them.  The pictures are easy for really young kids; a couple of the others are better for 5-8 or would still be good for younger with some parent explanation/help.


Travel and Play Cards 1
Travel and Play Cards 2
Travel and Play Cards 3
Travel and Play Cards 4
Travel and Play Cards 5

Read more...

Baked Tomatoes, Squash, and Potatoes

>> Tuesday, August 30, 2011

I get several magazines in the mail.  All of them are free subscriptions that I find online or get for free because of my home-based business.  I actually don't have any that I pay for right now.  One of my favorite magazines (and one I will probably purchase when my free trial runs out) is Whole Living magazine.  It's a Martha Stewart publication, so of course it's good.

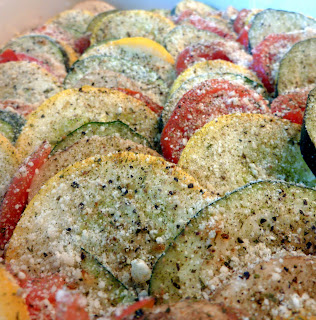
Last week I received the September 2011 issue and had a few recipes I wanted to try.  One of these recipes was Baked Tomatoes, Squash and Potatoes recipe found on page 66.  I couldn't find the recipe online yet (they must wait or maybe they don't post them online?), so I'll include the recipe and insert my comments as well...


Baked Tomatoes, Squash, and Potatoes
Serves 8

2 T extra-virgin olive oil, plus more for drizzling
1 onion, thinly sliced
2 tomatoes, sliced 1/4-inch thick
1 medium yellow summer squash, sliced 1/4-inch thick
1 medium Yukon gold potato, sliced 1/4-inch thick
Coarse salt and freshly ground pepper
1 T fresh thyme leaves (I didn't have fresh, so I sprinkled some thyme powder)
2 T freshly grated Parmesean


1. Heat oven to 375. Heat oil over medium and cook onion until tender and lightly golden, 6 to 8 minutes.

2. Arrange the onion on the bottom of a 9x13-inch baking dish. Overlap tomato, squash, and potato on top of the onion. Season with salt and pepper, sprinkle with thyme and Parmesean and drizzle with more oil.

3. Bake covered for 30 minutes. Uncover and bake until golden, 30 minutes more.


I pretty much followed the directions on this recipe except I used 3 potatoes.  The easiest way I found to layer the veggies was to make 4 piles, one of each veggie and then just take one from each pile and put it in the pan.

This recipe was good, but the only problem I found was that since you season the vegetables after you layer them, they were only half-way seasoned.  The part that was under the vegetable on top didn't have anything.  I think next time I make it, I will salt and pepper the veggies before layering them in the pan and then sprinkle the Parmesean over the top of everything.  Either that, or you can put salt and pepper on them after you serve it.

All in all, it's a great use of the seasonal vegetables right now and it's very yummy!  A recipe I will definitely make again!


Read more...

Simple Portrait Set-Up for the Momtograher

>> Monday, August 29, 2011

I am more than a little photography obsessed.  I borrowed my father-in-law's SLR camera when my youngest son was born, 3 1/2 years ago, and have never looked back. I ended up getting one for myself and then upgrading about a year later.  I am by no means an expert, but I am better now than I was then.  So I thought I'd share some tips on this blog for taking portraits of your kids.  It will be my attempt to focus on things that can be done with any camera, although if you have a point and shoot it is worth reading your manual to see what settings you can change.  And if you have an SLR, also read your manual and get off the automatic settings.  Automatic is great sometimes for quick snapshots, but your image quality will improve dramatically if you choose your settings and meter.

Here's an example of a simple portrait set-up for your home.  Great photos are always made by the light, so you have to find the spots that have great light.  And once you find them, you have to really look at your subject and see where the shadows are.

In our little rental apartment, we have the typical tungsten lighting everywhere.  Not good for pictures.  But we also have 2 large sliding glass doors (complete with lovely vertical blinds..).  For a close-up of my son, I placed him sitting 90 degrees to the sliding glass doors and opened the blinds a little.  It was morning and there were no shadows coming off the blinds on his face.  You could do the same with the blinds opened completely, and then just play with the distance between your subject and the doors.  And you may also need to move your subject forwards or backwards (parallel to the door).  Next, I had my son hold a big white reflector on his lap to bounce light back into his eyes.  You can see that on my photo, the right side of his face (our left looking at the photo) is darker then the left and has some shadowing.  I like that look because it adds dimension.  If you wanted a flatter look with less shadow, you'd just move your reflector so that it is more on the shadowed side and tilted up, rather than being flat on the subject's lap.  On the subject of reflectors, most people don't have one.  A big piece of white foamboard works great.  And finally, you want the focus to be on the face so you need a solid colored, light wall behind your subject. 

Here is my setup:


Here's the shot I got, straight out of the camera:

And here's my final product.  I did use photoshop and lightroom to edit this, although my editing was pretty simple and could be done in any program.  My steps were:  cropping, brightening, cloning out the baseboard and carpet in the background, sharpening his eyes a little, and converting to black and white. My finished product is very bright -- that's my personal preference.  Pictures always print darker than they look on the computer screen.  I do look at my color numbers in photoshop to make sure that although my photos are bright, the white/light areas aren't "blown out", meaning that the detail is not lost.


Try out the set-up on a doll or stuffed animal with shiny eyes so that you can see how moving your reflector affects the subject.  If you don't have glass doors, just open your front door or put your subject on a chair in front of a large window.

Read more...

Lunch Box Notes

>> Sunday, August 28, 2011

While I don't have any kiddos going to school this year, I have been in a back-to-school mode for some reason.  Maybe it's because I have a lot of friends who are teachers or that most of my friends have a kid that is at least going to pre-school.


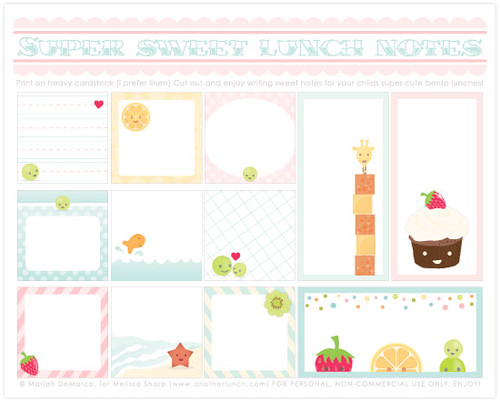
Anyway, one thing my mom did occasionally and something that I want to do for my kids when we get to this stage, is put notes in the lunch box.  Because she didn't do it every day, it was a nice surprise and such an encouragement to see!  I don't remember what Mom wrote the notes on, but I know it wasn't anything fancy.  But with the help of Pinterest.com (follow me on Pinterest here)and the internet, I found a ton of free printable lunch box note pages.  

Some of these are also suitable for sending in a lunch packed for your spouse as well :)

http://getbuttonedup.com/2010/08/25/tool-free-printable-lunchbox-notes/

http://kelsieandnate.blogspot.com/2011/08/friday-freebie-lunch-box-notes.html

http://silverboxcreative.com/blog/2010/08/lunch-box-notes/

http://freshpickedwhimsy.typepad.com/fresh_picked_whimsy/2009/02/love-notes.html

Ok, so this last one isn't a printable note, but you can also use a toothpick and "write" on a banana.  The note will show up about 1 hour later.  How cool!

Read more...

Homemade Grout Cleaner

>> Saturday, August 27, 2011

Undoubtedly, this is not the most exciting post ever.  I realize that, but I wanted to share it with you anyways.

As you might know from reading this blog, I had a baby about 4 weeks ago.  During this recovery time, I have watched WAY too much HGTV and DIY Network.  My project to-do list is growing longer by the day.

After discussing possible projects with my husband, I took a "research" trip to Lowe's and Home Depot.  My plan wasn't to purchase anything, but to check out a few options for different projects and try and figure out some pricing to see what we could tackle and when.

One of the projects I would like to do is to tile my backspalsh in the kitchen.  While in the tile aisle (BTW, I didn't find anything I liked at either store...boo), I realized that our kitchen floor grout was getting pretty gross.  So, I picked up a bottle of heavy-duty grout cleaner and another bottle of general tile cleaner and light sealer.

I continued on to a couple different departments to price things out and then made my way to the checkout.  And then...the checkout lady gave me the total...$16 for the two little bottles!  Yikes!  Plus there was a warning on the heavy-duty grout cleaner about prolonged exposure to the fumes.  Definitely not something I wanted in the house with a newborn.

So, I came home and promptly googled "Homemade grout cleaner".  Up popped a cool article that gave several ideas depending on your tile material and how dirty things were.  Our floors are a natural stone, so I decided to go with the most mild suggestion:  baking soda and water. Brilliant...because baking soda costs less than a buck!

Here's my before photo...the grout started originally the same color as the tile.  Ew.


The recipe calls for 3 parts of baking soda to 1 part of water.  Depending on how big of an area you need to clean, I suggest starting out with 1 cup of baking soda to 1/3 cup of water and test to make sure this is going to work for you.  Here is the baking soda and water mixture.


Here's the fun part.  I used a tooth brush to put this on the grout lines.  The boys enjoyed helping me for all of 2 minutes and I got stuck with the rest of the job.


The article says to leave on the baking soda for 10 minutes and then rinse clean.  But I have 3 kids to take care of, so the baking soda stayed on for about 45 minutes until I could get back to it.  But that just makes it cleaner, right?!  I figured it wouldn't hurt at least, so I didn't worry about it.  When I did get back to remove it, I used the toothbrush to scrub the lines again.  And guess what?  It works!!  Here's a shot where I used the baking soda mixture on the right but nothing on the left.  What a difference!


And here you can see I used the baking soda on the bottom half but not the top half.


The only downside of this project is that I had to mop twice after finishing each section.  We have a commercial mop bucket and mop (like they had at McDonald's, for example), so maybe it was the fact I used that and wasn't on my hands and knees scrubbing.  Not sure, but after mopping once, the tile still felt "gritty" from the baking soda, so I had to do it all again.  Considering the alternative of using the expensive, toxic-fumed stuff, this didn't bother me.

We have this tile in our kitchen, dining room, hall, 1/2 bath and entry way.  So needless to say, this wasn't a quick project.  I'm in the process now of finishing up the entry way area and then I will be done (YAY!).  Next on the to-do list is find a block of time long enough that I can mop and re-seal everything!

Read more...

Custom Name Necklace

>> Friday, August 26, 2011

Well, I did what I thought would be impossible.  I finally narrowed down my necklace choices and ordered one!   It took a while because there were so many cool options.

Here's the necklace!


Read more...

My Favorite Minestrone Soup and Beer Bread

>> Thursday, August 25, 2011

It's that time of year -- the kids are going back to school, football is starting, and fall is right around the corner.  While I love fall, I hate to rush it.  After all, in my opinion it is way too short and winter sets in well before I would like it to.  But mother nature rushes on and while we're enjoying these last days/weeks of summer I am starting to think about fall.

This is a perfect fall dinner.  It's easy, comforting, and filling.  The beer bread recipe is a nod to Tastefully Simple.  If you've ever been to one of their home parties, you've probably tasted it.  I have tried a few recipes to make it and this is the closest I've found.  This bread is super delicious, but it is a heavy bread.  Not your typical light yeast bread.

The soup is a recipe a former co-worker gave me, back in the days that my daily companions were over 4 feet tall!  It was a copy-cat recipe of Maggiano's soup that she found somewhere on the internet.  I wish I knew the source.

Beer Bread
3 cups self-rising flour
1/3 cup sugar
1 teaspoon kosher salt
12 ounces beer {I used Bud Light Lime}
2 tablespoons melted butter
Directions
1. Preheat the oven to 375 degrees F.
2. Butter an 8×4 inch loaf pan and set aside. In a large bowl, combine the flour, sugar, salt and beer; mix well. The mixture will be sticky. Pour into the loaf pan and bake for about 55 minutes.
3. At the last three minutes of baking, remove from oven, brush the top of the loaf with the melted butter and return to oven for the final three minutes of baking.

Minestrone Soup
2 tablespoons butter
1/2 cup diced onion
1 medium carrot, diced
1 stalk celery, diced
1/2 teaspoon dried oregano
1 teaspoon flour
1 clove garlic, peeled and minced
4 cups chicken stock
2 cups Maggiano's Marinara Sauce
1 small baking potato, diced
2 plum tomatoes, diced
1 medium zucchini, diced
1 yellow squash, diced
1/2 cup canned chick-peas, drained
1 teaspoon salt
1/2 teaspoon freshly ground black pepper
2 dark green romaine lettuce leaves, diced
1/4 ounce fresh basil leaves (stems removed), chopped
1/4 cup grated parmesan cheese, plus some for garnish
1/2 cup tubetti or other small pasta
In a large stock pot, melt butter over low heat. Add onion, carrot, celery and oregano. Cook, covered, until vegetables are soft but not browned, about 20 minutes.

Add flour and stir to form a paste. Add garlic, chicken stock, marinara sauce, potato and tomatoes. Raise heat and bring mixture to a boil.

Add zucchini, yellow squash, chick-peas, salt and pepper. Reduce heat to medium-low and simmer, uncovered, for 20 minutes.

Stir in romaine, basil and 1/4 cup Parmesan cheese. Remove from heat and let cool to room temperature. Refrigerate for 12 to 24 hours.

Reheat over medium-low heat. Meanwhile, cook pasta according to package directions.

Divide pasta among individual serving bowls and ladle hot soup over pasta. Serve with Parmesan cheese.

Servings: 8

My Notes:  I don't typically refrigerate for 12-24 hours.  Making the pasta separately keeps the soup from getting too thick.  I used dried basil.  And I use more Parmesan cheese -- this is the key to the flavor in my opinion!

Read more...

Anniversary!

>> Wednesday, August 24, 2011


Nine years ago today, I was walking down the aisle!  It's crazy to think about how much life has changed in the last 9 years.  I'm not going to lie, I was an immature 19 year old who thought I had the entire world figured out.  But I was in love and nothing was going to stop me.

In the last 9 years, I have grown up a lot.  We have sold a house, built a house and moved into said house.  We have gone through several job changes.  We have had THREE kids.  There have been tears.  Laughter.  Fights.  Joy.  There have been times we didn't think we would last.


But, I'm happy to say that I truly love him more today than I did 9 years ago.  He's my best friend and I couldn't imagine life without him. 

Love ya, babe.

Read more...

Healthy Recipes

>> Tuesday, August 23, 2011

Why do I torture myself by looking at all the amazing, calorie-laden dishes on Pinterest?  There are some healthy ones too, but of course those aren't the ones that attract my attention!  I have recently been making alot of healthy recipes, and have rediscovered a website I used a year or so ago.  It's called Skinny Taste and all the recipes have a nutritional analysis, along with old Weight Watchers points and new Weight Watchers points, in case anyone follows WW.   I have made a couple of things from this site that I didn't like, so if you make something and don't like it, give it one more chance by trying something else.
Here are some of the recipes I've made and loved:
Chicken Parmesan

Crock Pot Santa Fe Chicken:


Click on the recipe titles for the recipes!

Read more...

Teacher Appreciation Gift Idea Roundup

>> Saturday, August 20, 2011


Lots of cute start-of-school teacher appreciation gifts are floating around the web, so I thought I'd do a little round-up of some I've seen.  Please visit the link to the blog for more detail on the idea and in some cases free printables to make the gift.

From Lil Luna


From Domesticated Lady
From Domesticated Lady again:


There are so many cute teacher gift ideas out there.  Search "teacher gift ideas" on pinterest and you'll probably see most of these, along with many more.


Read more...

Cheesy Bacon Breakfast Bites

>> Friday, August 19, 2011

I recently went to a potluck breakfast.  Most of the things people were bringing were sweet, so I thought it would be nice to take a savory dish.  I found this recipe for Cheesy Bacon Breakfast Bites and thought it would be simple and fit the "savory" bill.  I was right!  The original recipe called for a can of Pillsbury Crescent seamless dough sheet, but I decided to make a homemade crescent roll instead.


Cheesy Bacon Breakfast Bites
1 (.25 ounce) package active dry yeast
1 cup warm water (110 degrees to 115 degrees)1 cup butter or margarine, melted1/2 cup sugar
3 eggs
1/2 teaspoon salt
4 cups all-purpose flour
4 to 5 slices of bacon (turkey or pork)
1/2 cup Mild Cheddar Cheese, shredded (I used 2%)

Directions
Night before:

In a small bowl, dissolve yeast in warm water. In a mixing bowl, beat butter and sugar. Add eggs, salt and yeast mixture. Stir in enough flour until dough leaves the sides of bowl and is soft (do not knead). Cover and refrigerate overnight.

Cook bacon as directed on package until desired crispiness.  Drain on paper towels and set aside to cool.


Morning of:

Grease (2) 9x13 baking dishes.  Punch dough down. Turn onto a floured surface; roll flat pressing into a 20x8-inch rectangle.  Sprinkle cheese evenly over dough.  Finely chop bacon and sprinkle evenly on top of cheese.

Roll up dough with fillings like how you would for cinnamon rolls. Place seam side down on cutting board.  Using a serrated knife, cut roll into 24 slices.  Place slices, cut sides up, in prepared baking pans. Cover and let rise in a warm place until doubled, about 1-1/2 hours.

Heat oven to 375 degrees.  Bake for 10-12 minutes or until the bottoms are just starting to turn brown and the cheese is melting in the middle.  


Read more...

Photo Shoot!

>> Thursday, August 18, 2011

As you can probably tell from the photos posted on our blog, Lesley's photos are definitely much better quality than mine!  Not only does she have MUCH better equipment than I have, but she also has a great eye for photography and has done a lot of self-teaching, reading, blog hopping, and practicing to help her become even better.  Kinda like I've done for my cake decorating.

Lesley's done some family photos for me in the past, but I knew with her moving it might be difficult for her to find time to take some newborn shots of Molly for me.  But she squeezed me in right as Molly turned 1 week old.  Here are some of my favorite shots of Molly and the boys.


Thanks, Lesley!!

Read more...