Search This Blog

Showing posts with label recipe. Show all posts

Yogurt and Fruit Parfaits

>> Thursday, April 12, 2012

I'm back for my first post in, err, a while.  I'm suprised Beth hasn't fired me yet!!!  We are moving into our new house in a little less than a month, so I hope to post more regularly then.  The past 10 months of living in a 2 bedroom apartment haven't been too terrible, but I haven't had much motivation to cook or craft in our small space.  The lighting is also terrible, so I haven't been able to take good pictures of any recipes I have made.  Over the next 3 months, I plan to do lots of DIY decorating of our new home, including a nursery for our baby girl due in July!!, and lots of cooking in my new kitchen and stocking my freezer in preparation for baby.  I hope to post about a lot of those things. 

I have also been terrible about responding to comments on our posts, but I appreciate them all.  I got several supportive comments on my motherhood vs. career post, and it's great to know other ladies can relate.  Just today there is a news story about a commentator attacking Mrs. Mitt Romney for "not working a day in her life".  I don't know much about the Romneys, but apparently she's raised 5 sons.  Sounds easy to me! (insert heavy sarcasm) Anyway, my point is that in a nasty world of women attacking each other and putting each other down, I am grateful for those who took the time to comment in such a positive way!

I am always looking for quick, healthy snacks my kids can grab from the refrigerator.  I am pretty much the pantry police, because my oldest son always heads there when he is hungry and I am always trying to direct him towards either a healthy pantry choice, or preferably something from the refrigerator.  I really don't have alot of candy, sweet things, or junk in my pantry -- I am much more likely to bake a cake than buy snack cakes or cookies or chips -- but still most items in my pantry that don't require preparation are inferior to choices in the fridge.  For some reason, my son doesn't choose unsweetened applesauce from the pantry!  Anyway, I love to make these and the kids love them too.  I have long been a fan of McDonald's yogurt parfaits, so that's kind of the idea behind these.  See what I mean about terrible lighting?


Choose your favorite yogurt.  I tend to use Dannon Light and Fit Vanilla Yogurt for the kids.  For myself, I try to use Greek yogurt for the extra protein (kids won't eat this kind).  I am addicted to the little Chobani Champions in Berry flavor.  I tried them in the store, and although they are meant for kids, I keep buying them and hiding them in the back of the fridge hoping no one else notices them.  Layer your yogurt with the fruit topping.  I like putting them in these glass jars and it makes them more attractive to the kids for some reason.  Before eating them, add granola if you want.  You could also layer it within the parfait, but I like mine crunchy and the kids don't like it at all.

Fruit Topping:  (blueberries, peaches, strawberries, raspberries)
2 cups fruit (I use frozen right now, may use fresh this summer as it is in season)
sugar -- amount depends on your taste.  The recipe I adapted called for 1/4 cup, but I use half of a 1/8 measuring cup.  Sometimes I use a couple of tablespoons and then 1 tablespoon of splenda.  Adjust this to your taste and to your preferred sweetener.
Place these in a saucepan over medium heat and stir until the frozen fruit starts to break down a little.  In a little bowl, mix together 1 tablespoon cold water, 1 and 1/2 teaspoons cornstarch, and 2 teaspoons lemon juice together.  When it is smooth, pour it in the saucepan.  Add a sprinkle of cinnamon to your taste, and a little vanilla.  Bring mixture to a boil and then quickly reduce to a simmer.  Stir a minute or two until thickened.  Remove from heat and let cool.

For cherry, I reduce the sugar a little more and use a tablespoon of brown sugar.  I also add about 1/2 teaspoon of almond extract to the mixture and omit the cinnamon.  I love the addition of the almond flavor to the cherries.

The parfait above has cherries and blueberries.  The strawberries make for a much prettier presentation, but this is probably my favorite flavor combo.  Don't skip the cinnamon. Just a little gives the fruit such a great flavor.  I keep these for 3 days or so in the fridge.  After that the fruit starts to get watery.  This fruit topping would also be good over pancakes, french toast, or frozen yogurt.


Read more...

Peanut Butter Banana Chocolate Chunk Cookies

>> Sunday, March 25, 2012

I've been trying to catch up on pinterest the last couple days because I've been so busy that I haven't been on there much.  There are a couple spring/summer projects that I want to do, so I was searching for some inspiration and instructions on how to do these projects.  First, I want to buy, re-build or build a new swingset from scratch.  Not sure which way I'm going on this project yet, but I was able to find some ideas on what I want with a limited budget, limited space and limited time.  Another project that i want to do is to replace our door to the basement with a sliding barn door.  You know, like a pocket door, but on the outside of the wall.  When our door is open now, it swings out into the hallway and is just in the way.

Anyway, whenever I'm on pinterest, I tend to find a lot of YUMMY looking recipes.  I also found this quote...which is totally true for me!  


I'm Type 1 diabetic, but I love my sweets and baked goods.  That's probably the reason I started my at-home bakery. :) And also the reason why I love my insulin pump so much!

Anyway, back to the whole purpose for this post...to share a "healthy" cookie recipe I found on there.  it's Vegan Peanut Butter Banana Chocolate Chunk Cookies.  These were good!  They don't have any refined sugar in them and they also don't have any flour.  It's still a "dessert" so you have to eat them in moderation (I've only eaten 4 today, haha!), but it's much healthier than eating one of those frosted cookies that are so yummy but so fattening!

cookie dough
baked!
Here's the recipe.  I need to note that I used green coconut.  Not because it's any better or anything, but I made some cupcakes and dyed coconut for those.  I way over-estimated and had a lot leftover, so I bagged it up and put it in the freezer to keep.  Since I was just making the cookies for us to eat at home, I figured it couldn't hurt!  The interesting thing was that just the coconut stayed green...it didn't make the whole cookie green like I thought it would.  Also, my cookies weren't vegan because I used regular chocolate chips (but I did use bittersweet ones).  I think if I make it again I will use less coconut and more oats...just because I don't really care so much for coconut.  For better pictures of the cookies (and with regular, un-dyed coconut), click on the recipe link below!

Peanut Butter and Banana Chocolate Chunk Cookies
Recipe adapted from http://fooddoodles.com, originally from Kitchen Karate
Makes about 2 1/2 dozen small cookies
  • 3 large ripe bananas
  • 1/2 C peanut butter
  • 3 tbsp coconut oil(or substitute any flavorless oil like canola)...I used 2 T canola oil plus 1 T applesauce
  • 1 tsp vanilla
  • 1-2 tbsp maple syrup
  • 2 C old fashioned rolled oats
  • 1/3 C shredded coconut
  • 1 tsp baking powder
  • 1/4 tsp cinnamon
  • 1/2 tsp salt
  • 1/2 C chocolate chips
  • up to 1/2 C other add ins(dried fruit, nuts, or more chocolate chips) Optional...I used 1/2 c dried cherries
Preheat your oven to 350 degrees.  Mash the bananas in a large bowl using a fork and combine with peanut butter, oil, maple syrup, and vanilla.  In a separate bowl mix the dry ingredients and then combine with the wet ingredients and mix well.  Add in the chocolate chips and dried fruit and mix just to combine.
Line a baking sheet with parchment paper and drop cookies by spoonfuls 1″ apart.  I used a smaller size ice-cream style scoop and then slightly flattened the tops. The cookies do not spread much and tend to keep their uncooked shape.  Bake for 12-14 minutes just till set.
Make sure they’re completely cool before putting them in an airtight container.  I’d even recommend leaving them on the counter for a couple hours because the bananas in them will make them soft if they’re covered too soon.  But don't leave them out too long, or you'll end up not having any left to put away!  


Read more...

Green Smoothie

>> Thursday, February 2, 2012

I saw that Beth had pinned a recipe for a green smoothie on Pinterest recently, and it reminded me that at one point I had taken a picture of one to share here.  Now I can't find the picture, so here is one I found online. 

IMG_6571-1.jpg

They are also called Green Monster smoothies.  You can find all kinds of recipes online.  It's basically a fruit smoothie with spinach that gives it a green color.  Some people use kale, which I haven't tried yet.  When it is blended, you can't even taste the spinach.  This is my basic recipe, but there are so many variations.  I use about 1/2 a cup of coconut milk, half a frozen banana (I think the banana is key.  The natural sweetness really covers up any spinach that you could taste and freezing it gives the smoothie a great, creamy consistency), a scoop of vanilla protein powder, and a tablespoon of natural peanut butter.  Then I fill the rest of my magic bullet cup up with spinach (maybe a cup or so) and blend.  Add ice cubes and/or more milk as needed to get the right consistency.  You could add in so many other things to increase the nutritional value -- chia seeds, flax seed, etc.  You could also change the fruits and maybe add another veggie that blends well.  But start with one containing banana.  I usually try to keep the caloric content of mine under 300, so that kind of determines what I put in it.  Try it and tell me what you think.  Also share any recipes you come up with here or on the facebook page.

Read more...

Taco Pasta

>> Monday, January 30, 2012

This is a really easy recipe that has entered our regular rotation of dinner recipes.  My kids both like it, which is pretty rare.  The recipe came from here:  Taco Pasta  There are some great recipes on this site, so make sure you either check out the recipe index or go to home and scroll back through her recent recipes.

Taco Pasta
1 pound ground beef or turkey or morningstar crumbles
8-12 ounces medium pasta shells or other small dry pasta shapes
1 small onion, chopped (about 1 cup)
1 clove garlic, minced
1 (14 oz.) can diced tomatoes with mild green chilies, drained (if making this for kids you might want to use just plain diced tomatoes but I used the green chilies and my kids didn't say it was too spicy)
1 packet (4 tablespoons) taco seasoning
3 ounces cream cheese
1/2 cup sour cream ( I used reduced fat)
Salt and pepper

Bring a large pot of water to boil. Cook pasta according to the package directions. Drain, reserving 1/2 cup of pasta water. Set aside.

Meanwhile, in a large skillet or sauté pan, cook the ground meat over medium-high heat until no longer pink. A few minutes before the meat is cooked through, add the chopped onion to the skillet. Once the meat is cooked through, mix in the garlic and cook until fragrant, about 30 seconds. Add in the diced tomatoes and taco seasoning and let simmer over medium heat for about 3-5 minutes.

Stir in the cooked pasta, cream cheese, sour cream and reserved pasta water, and continue stirring until the cream cheese is melted and the sauce is well blended. Season with salt and pepper to taste. Simmer over medium-low heat 3-5 minutes to reduce the sauce a bit if it is still too thin.


Read more...

White Chicken Enchiladas

>> Friday, January 20, 2012


So, this was another recipe I found on Pinterest a while ago (if you are still holding out and haven't checked the site out yet, you really should!  I can send you an invite if you need one!!).  I thought it looked yummy, so I pinned it to make it at a later date.  That later date was this past Tuesday evening.  YUM!


So the recipe was really easy, take 10 tortillas, fill them with a chicken and cheese mixture, roll them up and put them in the baking dish, spoon a sauce over top, spread cheese and then bake.  Except, I didn't have 10 tortillas....I only had 3.  Definitely not enough to feed our family of 4 (Molly doesn't eat this type of stuff yet).  I had about an hour to get dinner done and didn't want to take all three kids out to the grocery store.  So, I had remembered seeing another pin about how to make tortillas, so I looked for that and found it.  It was surprisingly easy and tasted really good!  I'm not sure if you could make a couple batches ahead of time and then put them in the fridge or if you would need to make them fresh for when you wanted to use them.  I'll have to experiment with that and let you know what I find out.  

Also, instead of using shredded chicken, I used some "Fresh Ham Steaks" that were in our freezer from our hog purchase last year.  These are basically pork chops, but ours are bigger than a regular pork chop.  I pan cooked them with a little salt and pepper and then cut it up and measured out 2 cups to use.   Anyway, here are the recipes...enjoy!

Ingredients
·         2  3/4 cups all-purpose flour, plus a little extra for rolling the tortillas
·         1/3 cup vegetable shortening
·         3/4 teaspoon salt
·         3/4 cup very warm tap water
Directions
1.           Combine the flour and shortening in a large mixing bowl.  Using a pastry blender or a fork, work the shortening into the flour  until it's mixed well and you can't see the shortening anymore.  
2.          Dissolve the salt in the warm water. Pour about 2/3 cup over the dry ingredients and immediately work it in with a fork.  Scoop the dough onto your work surface and knead until smooth.  It should be a medium-stiff consistency – not firm, but not quite as soft as most bread dough either.
3.          Divide the dough into 12 portions and roll each into a ball.  Set them on a plate, cover with plastic wrap and let rest for at 20-30 minutes – this makes the dough easier to roll.
4.          Heat an ungreased griddle or heavy skillet over medium to medium-high heat.
5.          Flatten a ball of dough, flour it, then roll forward and back across it; rotate a sixth of a turn and roll forward and back again; continue rotating and rolling until you reach a 7-inch circle, lightly flouring the tortilla and work surface from time to time.
6.          Lay the tortilla on the hot griddle (you should hear a faint sizzle and see an almost immediate bubbling across the surface).  After 30 to 45 seconds, when there are browned splotches underneath, flip it over.  Bake 30 to 45 seconds more, until the other side is browned; don’t overbake the tortilla or it will become crisp.  Remove and wrap in a cloth napkin placed in a tortilla warmer.  Roll and griddle-bake the remaining tortillas in the same manner – stack them one on top of the other in the warmer.

Ingredients
·         10 soft taco shells
·         2 cups cooked, shredded chicken (I used fresh ham steaks, or pork chops)
·         2 cups shredded Monterey Jack cheese
·         3 Tbsp. butter
·         3 Tbsp. flour
·         2 cups chicken broth
·         1 cup sour cream (I used plain yogurt)
·         1 (4 oz) can diced green chillies
Directions
1.         Preheat oven to 350 degrees.  Grease a 9x13 pan.
2.        In a sauce pan, melt butter, stir in flour and cook 1 minute.  Add broth and whisk until smooth.  Heat over medium heat until thick and bubbly.
3.        Stir in sour cream and chilies.  Do not bring to boil, you don't want curdled sour cream.
4.        Mix chicken (or pork) and 1 cup cheese and about ½ cup of the sauce.  Roll up in tortillas and place in pan. 
5.        Pour sauce over enchiladas and top with remaining cheese.
6.        Bake 22 min and then under high broil for 3 min to brown the cheese.

Read more...

Butternut Squash Ravioli with Brown Sugar Butter Sauce

>> Saturday, November 19, 2011

I'm sure by now Beth has given up on me!  Things are so crazy for us right now.  We have so many thing going on and 2012 is going to be a huge year for us. 

I have a super quick and easy recipe to share for now.   My husband and kids wouldn't touch this with a 10 foot pole -- entirely too weird for them.  But I think it's really, really good.

I bought the butternut squash ravioli at Costco.  While the ravioli is boiling (according to package directions), make the sauce:
1/4 cup butter
1/2 cup brown sugar
1/4 cup parmesan cheese, grated is best but I had shredded
1/8 tsp cajun seasoning
1/8 tsp sage
1/8 tsp nutmeg

Melt the butter and brown sugar together over low to medium heat.  Cook for a minute or so until it gets a little thickened.  As you can see in the photo, my heat was entirely too high and my sauce "seized up" so go low on the heat here.  Take the sauce off the heat and stir in the spices and cheese.  You many want to start with a little less of the spices and adjust according to your taste.  Stir the drained ravioli into the sauce and this will thin the sauce a little.

I made half this amount of sauce and about 8 ravioli pieces and thought it was more than enough sauce.  So you'll have to play with the amounts depending on how much sauce you want.  I tried to go light on the sauce.  You could also add some bacon or toasted walnuts to this.

Read more...

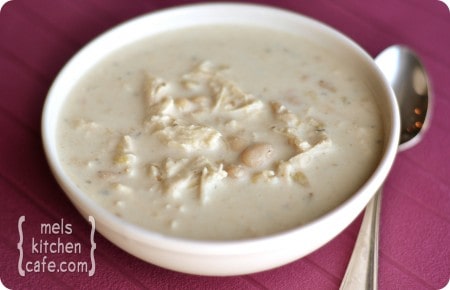
Soup Recipes - White Chicken Chili and Loaded Potato Soup

>> Sunday, November 13, 2011

Sheesh..it's been a busy couple of weeks!  Sorry about the lack of posting around here.  You know I've been really busy because I haven't been on pinterest.com or on my google reader for about 2 weeks!

The weather has been really crazy...one day there's frost on the ground and the next day is nearly 70 degrees out.  But this time of year, I really love to have a nice warm bowl of soup.  My two favorite soups?  White Chicken Chili and Loaded Potato Soup.   Both are are a creamy soup, so they aren't super-healthy, but they are quick and easy and tasty.  Despite what a lot of my friends think, I don't like to spend all my time in the kitchen.  I love a good meal, but I don't want to spend all day making it.  After all, I do have 3 kids who need my attention, a dog and a house to clean as well.  Who has time to slave away in the kitchen all day on one meal?!


Creamy White Chili
*Serves 6
1 pound boneless, skinless chicken breasts, cut into 1/2-inch cubes
1 medium onion, chopped
1 1/2 teaspoons garlic powder or 2 cloves fresh garlic, finely minced
1 tablespoon oil
2 cans (15 1/2 ounces each) Great Northern Beans, rinsed and drained
1 can (14 1/2 ounces) chicken broth
2 cans (4 ounces each) chopped green chilies (if you like less kick, add just one can)
1 teaspoon salt
1 teaspoon ground cumin
1 teaspoon dried oregano
1/2 teaspoon pepper
1/4 teaspoon cayenne pepper
1 cup sour cream
1/2 cup whipping cream
Fresh cilantro, for garnish (optional)

In a large saucepan, saute chicken, onion and garlic powder (or fresh garlic, if using) in oil until chicken is no longer pink. Add beans, broth, chilies and seasonings. Bring to a boil. Reduce heat; simmer, uncovered, for 30 minutes. Remove from the heat; stir in sour cream and cream. Garnish with fresh cilantro, if desired. Serve immediately. This is especially good served with tortilla chips.

Slow Cooker Option: In a medium round slow cooker, place 1 pound chicken breasts (fresh or frozen) without cubing them. Add the chopped onion, garlic powder, beans, green chiles and all of the spices. Do not add the sour cream or whipping cream yet! Reduce the chicken broth to 12 ounces (about 1 1/2 cups) and pour in over the other ingredients. Stir the mixture around a bit to incorporate the dry spices. Cook on low for 5-7 hours (if using frozen chicken you'll cook on the longer end of that spectrum, fresh chicken will cook in less time). Remove the chicken to a cutting board and shred in bite-size pieces. Stir back into the slow cooker. In a small bowl or liquid measuring cup, whisk together the sour cream and whipping cream  until smooth. Whisk the cream mixture into the crockpot with the other ingredients. Let the soup cook until heated through. Serve.

*Note:  I combined the two methods and sauteed the chicken, onion and garlic in the oil and then transferred it to the crock pot and added the remainder of the ingredients and cooked it over low for 4-6 hours.  About 30 minutes before serving, I added the sour cream and whipping cream.

source

O’Charley’s Baked Potato Soup
source: copykat.com
Yield: approximately 12 large servings.
3 lbs. red potatoes
1/4 C. margarine, melted
1/4 C. flour
8 C. half-and-half
1 (16-ounce) block Velveeta cheese, melted
White pepper, to taste
Garlic powder, to taste
1 tsp. hot pepper sauce
1/2 lb. bacon, fried crisply
1 C. cheddar cheese, shredded
1/2 C. fresh chives, chopped
1/2 C. fresh parsley, chopped

Dice unpeeled red potatoes into 1/2-inch cubes. Place in a large Dutch oven, cover with water and bring to a boil. Let boil for 10 minutes or until 3/4 cooked.

In a separate large Dutch oven, combine melted margarine and flour, mixing until smooth. Place over low heat and gradually add half-and-half, stirring constantly. Continue to stir until smooth and liquid begins to thicken.
Add melted Velveeta. Stir well. Drain potatoes and add to cream mixture. Stir in pepper, garlic powder and hot pepper sauce.

Cover and cook over low heat for 30 minutes, stirring occasionally.

Place soup into individual serving bowls and top with crumbled bacon, shredded cheese, chives and parsley.


Read more...

Pumpkin Cookies with Cream Cheese Icing

>> Saturday, November 5, 2011

I made these cookies this week and they were so good!  To me, they were definitely a "fall" cookie and would be perfect for Thanksgiving.  Or just to make and eat all by yourself.  :)  This batch definitely makes enough to share, though!  These are a cake-y cookie and would also be good to make into whoopie pies (2 cookies back-to-back with the icing in between, like an oreo!).  I actually preferred these cookies without the icing...tastes like a pumpkin pie with a cake texture!

I followed the directions exactly except I used some frozen pumpkin I had in the freezer.  The key with using fresh or frozen pumpkin instead of the canned stuff is to strain it and puree it really good.  I used our Magic Bullet, but you could also use a food processor.  If you visit her blog, she has lots of great photos of the entire process!


Pumpkin Cookies:
Combine:
1 Cup Shortening
3 Cups Sugar
Add:
2 eggs
Mix in:
1 large can pumpkin (30 ounces)
Now add:
1 tsp. vanilla
5 cups flour
And then add:
2 tsp. cinnamon
2 tsp. nutmeg
2 tsp. baking soda
2 tsp. baking powder
1 tsp. salt
Now, bake @ 350 for about 10-12 minutes. Let cool & then ice using the following Cream Cheese icing.
Cream Cheese Icing:
Combine:
2 (8 ounce) packages cream cheese, softened
1/2 cup butter, softened
Gradually mix in: 2 cups sifted confectioners’ sugar
1 teaspoon vanilla extract
Blend until smooth. Store in the refrigerator after use.
Recipe courtesy of Allison @ www.houseofhepworths.com


Read more...

10 Weeks of Christmas -- Week Three...Christmas Cookies!

>> Monday, October 31, 2011

One of my favorite things about Christmas is the food.  Specifically all the sweets.  Many of you know, I am a Type 1 Diabetic, but I haven't always been.  I wasn't diagnosed until I was 20, so I had 20 perfectly glorious years where I didn't have to count carbs or worry about my blood sugar levels.  And because I had a "teenager's metabolism" I didn't even have to worry about calories or fat.  Oh, to be young again!

Anyway, I really do LOVE me some Christmas cookies!   We have a lot of traditional cookies that are made every year, so I thought I would share some of them with you.  To me, they mean Christmas is here, family, traditions.  You know, everything about Christmas.  Enjoy!


Candy Cane Cookies - my Grandma Jean


1/2 cup shortening
1/2 cup margarine
1 cup sifted powdered sugar
1 egg
1 tsp vanilla
1 1/2 tsp Almond extract
2 1/2 cup flour
1tsp salt
1/2 tsp. red food coloring
1/2 cup crushed peppermint candy canes
1/2 cup granulated sugar

Directions:
Heat oven to 375'.  Mix shortening and butter, powdered sugar, egg and flavorings well.  Add salt and then gradually add flour.  Remove from mixing bowl and divide in half.  Blend red food coloring into one of the halves, leaving the other 1/2 without coloring.  Roll 4" strip of cough (1/2 to 1 tsp of dough) from each color.  Using lightly floured board, place strips side by side.  Press together at top and twist like a rope.  For best results, complete 1 cookie at a time as they tend to dry out.  Place on ungreased cookie sheet.  Curve top for handle (like a real candy cane).  Bake 9 minutes.  While still warm, remove from pan and sprinkle with mixture of candy and sugar.


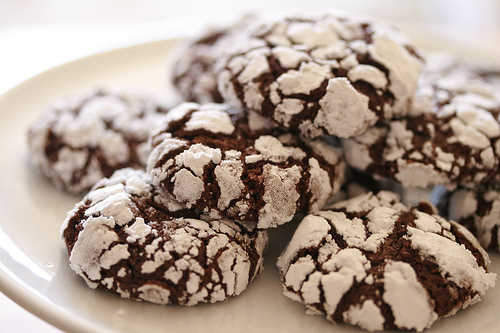
Chocolate Crinkles - My Grandma Jean


1/2 cup vegetable oil
4 squares unsweetened chocolate (melted, 4 ounces)
2 cups granulated sugar
4 eggs
2 tsp. Baking Powder
2 tsp. vanilla
1/2 tsp. salt
2 cups flour
1 cup Powdered sugar

Directions:
Mix oil, chocolate and granulated sugar.  Blend in 1 egg at a time.  Mix well.  Add vanilla.  Sift flour, baking powder and salt into oil mixture.  Mix all together.  Chill several hours or overnight.  Heat oven to 350'.  Drop a teaspoon of dough into powdered sugar.  Rolling sugar, shaping into ball.  Place 2" apart on greased cookie sheet.  Bake 10-12 minutes.  Do not overbake.  Makes about 6 dozen.


Butter Pecan Turtle Cookies


Crust:
2 cups flour
1 cup butter or margarine
1 cup brown sugar
1 cup pecan halves

Caramel Layer:
2/3 cup butter or margarine
1/2 cup brown sugar

Top:
1 lb milk chocolate

Directions:
Preheat oven to 350'.  Combine crust ingredients, reserving pecans.  Mix 2-3 minutes.  Pat firmly in ungreased 9x13 pan.  Sprinkle pecans evenly over unbaked crust.  Prepare caramel layer.  Pour evenly over pecans and crust.  Bake for 18-22 minutes or until caramel layer is bubbly and crust is light golden brown.  Remove from oven and sprinkle with chocolate chips.  Allow chips to melt slightly then swirl as they melt.  Cool.  Cut into bars.

Caramel layer: in heavy sauce pan, combine brown sugar and butter.  Cook over medium heat stirring constantly until mixture begins to boil.  Boil 30 seconds to 1 minute, stirring constantly.  


Peanut Blossoms (aka peanut butter kiss cookies)


3.5 cups sifted flour
2 tsp baking soda
1 tsp salt
1 cup shortening
1 cup peanut butter
2 cups granulated sugar
1 cup firmly packed brown sugar
2 eggs
4 Tbs milk
2 Tbs vanilla
Hershey's chocolate kisses

Directions:
Preheat oven to 375'.  Grease baking sheets.  Sift flour, soda and salt onto a piece of waxed paper.  In a mixing bowl, cream shortening, peanut butter, 1 cup of the granulated sugar and brown sugar until light and fluffy.  Stir in eggs, milk and vanilla and beat until blended.  Stir in flour mixture and mix well.  Shape into balls and roll in remaining sugar.  Place about 2" apart on baking sheets.  Bake in preheated oven 9 minutes.  Top each cookie with a chocolate kiss and bake 2 minutes longer.  Remove from baking sheets and coll on wire racks.  Makes about 6 dozen cookies.


Pecan Shortbread Cookies


2 sticks unsalted butter, room temperature
2/3 cups powdered sugar
1/2 tsp vanilla
2 cups flour
1/2 cup pecan bits
1 lb. powdered sugar

Directions:
In mixer, beat butter and powdered sugar on medium speed for around 3 minutes.  The mixture should be very smooth.  Beat in the vanilla then reduce the mixer to low and add flour, mixing only until it is incorporated.  Do not overmix.  Add pecans.  Using a spatula, transfer the soft, sticky dough to a gallon sized plastic bag.  Put the bag on a flat surface and spread the dough evenly in the bag.  The end result will be a square of dough about 1/4" thick.  Seal the bag and refrigerate for at least 2 hours, or up to 2 days.
When ready to bake, preheat oven to 325'.  Line 2 baking sheets with parchment paper or silicone mats.  Remove dough from fridge and cut away the bag.  Using a sharp knife, cut the dough into bars, about 1.5"x.5".  Transfer the bars to baking sheets and carefully prick each one twice with a fork.  Bake for 18-20 minutes, rotating sheets half way through.  They are done when they turn a pale color...watch so the bottoms don't get too dark.  When you remove them from the baking sheets, roll in powdered sugar while still hot.  Place on cooling rack to cool and serve at room temperature.


Buckeyes


1.5 cups peanut butter
1 cup butter, softened
1/2 tsp vanilla
6 cups powdered sugar
4 cups semisweet chocolate chips

Directions
In a large mixing bowl, combine peanut butter, butter, vanilla and powdered sugar.  The dough will look dry.  Roll into 1" balls and place on cookie sheet lined with wax paper.  Chill in the freezer until firm, around 30 minutes.  Melt chocolate chips in a double boiler or a bowl set over a pan of barely simmering water.  Stir frequently until smooth.  Remove peanut butter balls from freezer.  Using a toothpick, dip frozen balls into melted chocolate, leaving a small portion showing at the top to make them look like buckeyes.  Put the buckeyes back on the cookie sheet and refrigerate until hardened.  After hardened, remove from cookie sheet and place in a cookie tin that can be stored in the fridge as these melt easily and should be served chilled.


Read more...

Golden Grahams S'mores Treat

>> Friday, October 14, 2011

I had half a bag of golden grahams recently that I wanted to get rid of, and I found this recipe on realmomkitchen.com..  Link for the recipe is here  It was very good.  I did half the recipe.


Golden Graham S'mores Treat:
9 cups golden grahams
3/4 cup light corn syrup
3 tablespoons butter
11 1/2 oz package semisweet chocolate chips
1 tsp vanilla
3 cups mini marshmallows (I used big ones cut up into pieces because that's what I had, but I'm sure minis would be much less messy!)

Line a cookie sheet with parchment paper or grease with butter.  Measure golden grahams into a large bowl.  Melt butter, chocolate chips and syrup in the microwave by cooking at 30 second intervals and stirring every 30 seconds until smooth.  Stir in vanilla.  Pour over cereal and mix.  Stir in marshmallows and spread on pan, pressing down lightly with moistened hands.

Best eaten the day it is made, so when I make this again I will half the above recipe again.

Read more...

Crock Pot French Dip Sandwiches

>> Thursday, October 13, 2011

I made these recently and thought they were really good.  I adapted a recipe from allrecipes.com


French Dip Sandwiches:

Place a chuck roast in your crock pot and top with 1 can of Campbell's French Onion soup, 1 can of beef consomme, and half a can/bottle of beer (any kind works).  Sprinkle with some garlic salt and pepper (maybe 1/2 teaspoon each) and a tablespoon of worchestershire sauce.  Cook on low until fall apart tender.  Time will vary with your crockpot.  Mine took about 4 hours.  If it is still tough, keep cooking it!! The only mistake you can make is not cooking long enough.  When it is fall apart tender, shred the meat and discard any fat.  Take some of the juice from the crockpot and mix it with the meat until it is really moist.  Serve on buns with cheese of your choice (we like sharp cheddar) and we added banana peppers.  You could also add mushrooms while cooking or after, and you could thicken the sauce and serve with noodles instead of as a sandwich.

Read more...

Baked Pumpkin Spice Donuts with Maple-Cinnamon Glaze

>> Sunday, October 9, 2011

This year my oldest son is in first grade.  A whole new landscape for us.  He rides the bus, stays at school for the whole day, comes home grumpy as all get-out ready to point out all the things I didn't do right -- forgetting to cut the crust off his sandwich or not filling up the water bottle properly.  All those super important things any mom worth anything knows.  There are new kids, a new teacher, a new building, larger amounts of homework, bigger expectations.  And new after school activities.

This year, my little boy became a Cub Scout.  Primarily because he would get to "shoot guns and things, wear a uniform, and start fires."  Very valid reasons to enlist in the Cub Scouts.  And now, we're selling popcorn for the scouts.  Which brings me to this minor point of irritation -- why do they line all the prizes up at the meeting and say "look kids, you can win this super awesome boomerang if you just sell $400,000 of popcorn!  Or, how about a squirt gun for a measly $1 million in sales?  Or, if you sign over your first born child now, you can win a scooter!!!  And why is a plastic nerf-like gun that you win for selling 2 billion dollars worth of popcorn so much cooler than a similar version which can be purchased for less than $15 at WalMart or Target in your kid's eyes?  Ahh, the mysteries of parenthood.

In happier news, these donuts are cheap and easy!  I had requested a donut pan for my birthday from the kids.  Apparently my oldest son waivered at the store when his dad suggested it because "mom is on a diet".  But, his love of donuts prevailed and instead of a donut pan they brought home a donut making device that looks kind of like a waffle iron.  I found a recipe for pumpkin donuts from Taste and Tell.  I followed the directions with just 2 minor modifications/additions.  I added some nutmeg to the glaze and I dipped them in cinnamon sugar after I glazed them.  And of course I baked them in my fancy contraption rather than the oven.  I am normally not a big fan of donuts because to me they have a taste of grease/oil.  Because these were baked they were more like a cake or muffin.  They were delicious and I'll definitely be making them again!


Doughnuts
  • 2 cups all-purpose flour
  • 1 1/2 teaspoons baking powder
  • 1/2 teaspoon salt
  • 1/4 teaspoon baking soda
  • 1/2 teaspoon nutmeg
  • 1 1/2 teaspoons cinnamon
  • 1/4 teaspoon ginger
  • 1/2 cup brown sugar
  • 1 cup pumpkin puree
  • 2 eggs
  • 2 tablespoons milk
  • 1/4 cup butter, at room temperature
  • 1 teaspoon vanilla extract
  • Maple-Cinnamon Glaze
  • 1 1/2 cups powdered sugar
  • 1/2 teaspoon maple extract
  • 1/2 teaspoon cinnamon
  • 1/4 teaspoon nutmeg
  • 2 tablespoons milk
Instructions
  • Preheat the oven to 350F. Prepare a doughnut pan by spraying with non-stick cooking spray.
  • In a large bowl, sift together the flour, baking powder, salt, baking soda, nutmeg, cinnamon and ginger. Set aside.
  • In another bowl, cream together the brown sugar, butter and pumpkin. Add in the eggs, mix well, then mix in the vanilla. Stir in the reserved dry ingredients.
  • Place the mix in a large zip-top bag. Cut off the corner and pipe into the doughnut pan.
  • Bake in the preheated oven until a toothpick inserted in the center comes out clean, about 10 minutes. Remove pan from oven, let rest for 5 minutes, then remove from pan and allow to cool completely on a wire rack.
  • Meanwhile, make the glaze: In a small bowl, whisk together the powdered sugar, maple extract, cinnamon, nutmeg and milk.
  • When the doughnuts are cooled, dip them in the glaze. Follow by dipping in cinnamon-sugar while glaze is still wet. (mix 1/4 cup sugar and 1 tsp cinnamon to make cinnamon-sugar). Return to the wire rack to allow the glaze to set.

Read more...

Recipes to take to someone

>> Monday, October 3, 2011

As most of you know, I had a baby a couple months ago. She was baby #3, which meant that my schedule suddenly got even more hectic. Fortunately, I belong to a WONDERFUL group of moms and they came to the rescue! They brought me meals every Monday, Wednesday and Friday for THREE ENTIRE WEEKS! Did I mention that I LOVE my MOMS club?

Because this was baby #3, I think most people thought I had everything under control and would be fine, because nobody else brought me meals this time around except my wonderful next door neighbor. But this was probably the hardest post-pregnancy time I've had. Because not only are my boys constantly on the move, but it's taken a lot longer this time around for my body to recover from c-section #3. Have I mentioned how much my MOMS Club rocks?!

Anyway, I wanted to share the recipes of what people brought me. Because all the meals were good, none of them were repeats, and some of them were different than your usual casserole (not that those are bad!) and I know that the hardest part for me in taking a meal to someone is actually deciding on what to take.

Enjoy this list, and I hope it inspires you next time you would like to take a meal to someone.

Recipe #1
Creamy Baked Ziti


what you need
4 cups ziti pasta, uncooked
1 jar (26 oz.) marinara sauce
1 can (14-1/2 oz.) diced tomatoes, undrained
6 oz. (3/4 of 8-oz. pkg.) PHILADELPHIA Cream Cheese, cubed
3/4 cup BREAKSTONE'S or KNUDSEN Sour Cream
1 pkg. (8 oz.) KRAFT Shredded Mozzarella Cheese with a TOUCH OF PHILADELPHIA
1/3 cup KRAFT Grated Parmesan Cheese

make it
HEAT oven to 375ºF.

COOK pasta in large saucepan as directed on package, omitting salt. Remove from pan; drain. Meanwhile, add marinara sauce, tomatoes and cream cheese to same pan; cook on medium heat 5 min. or until cream cheese is melted and mixture is well blended, stirring frequently. Return pasta to pan; mix well.

LAYER half the pasta mixture in 13x9-inch baking dish; cover with layers of sour cream, 1 cup mozzarella and remaining pasta mixture. Top with remaining mozzarella and Parmesan.

BAKE 20 min. or until heated through.


Recipe #2
Southwest Chicken Salad


what you need 
1 bag salad mix
Various favorite veggies (peeled and chopped cucumber, carrots, cherry tomatoes)
1 can or 1 and 1/2 cups frozen corn, drained or thawed
1 can black beans, drained
Tyson or Kroger brand fried chicken fritter style, baked according to directions then cut into small pieces
sharp cheddar cheese- use as much as you like
Santa Fe style tortilla strips (usually found near the salad section at the store)- as a topper

make it 
layer all ingredients in listed order. This is good with southwest ranch dressing or regular ranch mixed with salsa (1:1 ratio)!


Recipe #3
Simply Lasagna


what you need
1 lb. ground beef
2-1/2 cups KRAFT Shredded Low-Moisture Part-Skim Mozzarella Cheese, divided
1 container (15 oz.) POLLY-O Natural Part Skim Ricotta Cheese
1/2 cup KRAFT Grated Parmesan Cheese, divided
1/4 cup chopped fresh parsley
1 egg, beaten
1 jar (24 oz.) spaghetti sauce
1 cup water
12 lasagna noodles, uncooked

make it
HEAT oven to 350°F.

BROWN meat in large skillet on medium-high heat. Meanwhile, mix 1-1/4 cups mozzarella, ricotta cheese, 1/4 cup Parmesan, parsley and egg until well blended; set aside.

DRAIN meat; return to skillet. Stir in spaghetti sauce. Add 1 cup water to empty sauce jar; cover with lid and shake well. Add to meat mixture; stir until well blended. Spread 1 cup meat sauce onto bottom of 13x9-inch baking dish; top with layers of 3 lasagna noodles, 1/3 of the ricotta cheese mixture and 1 cup meat sauce. Repeat layers twice. Top with remaining noodles, meat sauce and cheeses. Cover with foil sprayed with cooking spray.

BAKE 1 hour or until heated through, removing foil after 45 min. Let stand 15 min. before cutting to serve.


Recipe #4
Barbecue Pork and Penne Skillet Recipe


what you need 
1 package (16 ounces) penne pasta
1 cup chopped sweet red pepper
3/4 cup chopped onion
1 tablespoon butter
1 tablespoon olive oil
3 garlic cloves, minced
1 carton (18 ounces) refrigerated fully cooked barbecued shredded pork
1 can (14-1/2 ounces) diced tomatoes with mild green chilies, undrained
1/2 cup beef broth
1 teaspoon ground cumin
1 teaspoon pepper
1/4 teaspoon salt
1-1/4 cups shredded cheddar cheese
1/4 cup chopped green onions

make it 
Cook pasta according to package directions. Meanwhile, in a large skillet, saute red pepper and onion in butter and oil until tender.

Add garlic; saute 1 minute longer. Stir in the pork, tomatoes, broth, cumin, pepper and salt; heat through.

Drain pasta. Add pasta and cheese to pork mixture. Sprinkle with green onions.


Recipe #5
Fannie Farmer's Classic Baked Macaroni & Cheese


what you need
1 (8 ounce) packages macaroni
4 tablespoons butter
4 tablespoons flour
1 cup milk
1 cup cream
1/2 teaspoon salt
fresh ground black pepper, to taste
2 cups cheddar cheese, shredded good quality
1/2 cup breadcrumbs, buttered

make it
1. Preheat oven to 400°F.
2. Cook and drain macaroni according to package directions; set aside.
3. In a large saucepan melt butter.
4. Add flour mixed with salt and pepper, using a whisk to stir until well blended.
5. Pour milk and cream in gradually; stirring constantly.
6. Bring to boiling point and boil 2 minutes (stirring constantly).
7. Reduce heat and cook (stirring constantly) 10 minutes.
8. Add shredded cheddar little by little and simmer an additional 5 minutes, or until cheese melts.
9. Turn off flame.
10. Add macaroni to the saucepan and toss to coat with the cheese sauce.
11. Transfer macaroni to a buttered baking dish.
12. Sprinkle with breadcrumbs. Bake 20 minutes until the top is golden brown.

(You can also freeze this recipe in zip-lock bags for later use - once you have mixed the macaroni along with the cheese sauce allow to cool to room temperature before adding to your freezer - I generally pull it out the night before and allow macaroni and cheese to reach room temperature; I then add the macaroni and cheese to a buttered baking dish, sprinkle with bread crumbs and then bake for 20 to 30 minutes, until golden brown on top and bubbling.


Recipe #6
Southwestern Taco Pot Pie

what you need
1 pound lean ground beef
1 (1.25-ounce) package Taco Seasoning Mix
1 tablespoon oil
1/3 cup water
1 (1-pound) package frozen green, red and yellow peppers and onions*
1 teaspoon garlic powder
1 teaspoon onion powder
1/4 teaspoon salt
1/8 teaspoon pepper
1 (11-ounce) can whole kernel corn, drained
1/2 cup salsa
1 (15-ounce) package refrigerated pie crusts, softened as directed on package
8 ounces (2 cups) shredded cheese recommended: Colby/Monterey blend or Mexican blend
Garnish:
Sour cream
Taco Sauce

make it 
Brown ground beef in large skillet over medium-high heat for 8 to 10 minutes or until thoroughly cooked, stirring frequently. Drain. Add taco seasoning mix and water; mix until ground beef is well coated.
Preheat the oven to 400 degrees F.

Meanwhile, heat oil in large saucepan over medium high heat until hot. Add peppers and onions; cook 4 to 5 minutes or until tender, stirring occasionally. Remove from heat and drain excess liquid. Add garlic and onion powders, salt, pepper, corn, and salsa, stir well and set aside.

Prepare pie crusts as directed on package for 2-crust pie using 9-inch glass or metal pie pan.

Combine salsa and corn mixture with ground beef; mix well. Sprinkle 1/2 cup of cheese evenly in bottom of crust-lined pan. Spread 1/2 of beef mixture evenly in pan over cheese, pat down. Sprinkle 3/4 cup cheese in pan and spread evenly with remaining beef mixture, pat down, top with remaining 3/4 cup cheese. Top with second crust and flute; slit in several places.

Bake for 30 minutes or until crust is golden brown. Cover edge of crust with strips of foil or a pie crust shield after 15 minutes of baking. Let stand 5 minutes before serving. Store in refrigerator.
Garnish with a dollop of sour cream and a drizzle of taco sauce. Also recommended: guacamole, salsa, and diced green chiles.

* If using fresh peppers and onions, use 1 1/2 cups chopped onions and 2 1/2 cups chopped peppers and increase prep time and stove top cooking time.


Recipe #7
Baked Barbecue Chicken, (served with Mashed Potatoes and Broccoli) 


what you need 
1 package drumsticks
2 cups ketchup
2 tablespoons Worcestershire sauce
2 tablespoons apple cider vinegar
1 cup brown sugar
salt and pepper to taste

make it 
Preheat the oven to 450. 

Place the drumsticks into a baking pan or on a rimmed baking sheet lined with foil or a baking mat.

Combine the rest of the ingredients. Pour 1 cup of the sauce over the chicken, reserving the rest. Bake the chicken until it’s opaque. About 40 minutes. Pour the rest of the sauce over the chicken and bake about 5 minutes longer. Serve!


Recipe #8
Italian Chicken 


what you need 
4 (4 ounce) boneless skinless chicken breast halves
1 cup Italian salad dressing
2 tablespoons grated Parmesan cheese
1/4 teaspoon salt
Chopped tomatoes and green onions, for garnish
1 cup Mozzarella cheese
1 lb pasta, cooked as directed

make it 
Combine Chicken and Italian dressing in a zip-loc bag. Refrigerate for an hour or more.

Cook pasta as directed on package.

Place chicken in a greased 9-in. square baking dish. Drizzle with salad dressing; sprinkle with Parmesan cheese and salt if desired. Bake, uncovered, at 375 degrees F for 20-25 minutes or until chicken juices run clear. 

To deliver, place noodles on the bottom of a foil baking dish. Top with chicken and Italian dressing juices. Sprinkle with chopped tomatoes, green onions and Mozzarella cheese.


Read more...